
This Valentine’s Day I decided to really get my bake on! I opted for three different treats and I loved how each of them turned out!
Below are the three recipes and pictures of each dessert! I hope you try these cute treats out and enjoy them as much as I did!
Sweet Treat #1: White-chocolate covered Oreo truffle hearts
I love to bake but if I have the chance to make a dessert that requires NO baking (yes, you heard that correctly) I am all ears! These delectable heart shaped truffles are the perfect mix of creamy on the inside and crunchy on the outside! If you don’t eat these all to yourself (which is totally understandable) they make a perfect Valentine’s Day gift wrapped up in cellophane with some ribbon.

To make these treats into a heart-shape all you need is a heart-shaped cookie cutter. This option proved to be a lot faster than rolling them into balls which is typically how truffles would be made. This recipe is without a doubt a piece of cake! It’s as simple as finely grinding the Oreo cookies and placing them into the cream-cheese mix, spread this mixture onto baking paper, place in the freeze (this makes it MUCH easier to use the cookie cutters), then all you have to do is dip the hearts into melted chocolate and decorate how you please! 🙂
I only did a single-dip of chocolate for mine, but if I were to make them again I think I would do a double-dip to make a thicker and smoother finish on the hearts! You can opt-out of the sprinkles but I thought they added a nice extra crunch to the creamy texture inside!
The thought of making truffles might frighten you but you have my word that these Oreo Truffles are super simple to make! The mixture might not look the most appetizing before its dunked in chocolate but the taste makes up for its looks! The only downfall of these treats is that they’ll disappear before you know it!


Ingredients: ( 3 simple ingredients! )

* One (1) box of Oreo cookies-crushed finely into crumbs
* 5 oz of softened cream cheese
* 12-14 oz of white chocolate candy melts or bakers chocolate
*Sprinkles (optional, but necessary)

Step-By-Step Instructions:

* Line a tray or baking sheet with wax paper
* Crush whole Oreos (filling and all) into really fine crumbs, and combine with the softened cream cheese
* You can do this by hand (a little bit messy), or use a mixture with a paddle attachment. I found it a lot easier to just knead the mixture but hand.
* Once the mixture is evenly combined you can transfer it onto the wax paper. Spread it in an even layer about a 1/2 in thickness (or larger depending on what size you want your hearts to be)
* Place the tray into the freeze for about 45 minutes (or until it's hardened)
* Using your heart-shaped cookie-cutter cut out the shapes and place them back in the freezer for another 20-30 minutes. ***Truffles must be frozen before dipping them in the chocolate!
* Take a few hearts out a time to dip in chocolate and decorate while the others stay frozen in the freezer until you're ready to get working on them.
* Using a fork dunk your hearts into the melted chocolate and tap off any excess chocolate. Transfer your completed hearts onto the wax paper and put any sprinkles on at this point if you are going to use them.
* The truffles can be stored in an airtight container in the fridge or freezer (freezing them will last longer)
* Yields approximately 16-20 small (about 1.5 inch) heart treats

ENJOY! xoxo
Sweet Treat #2: Chocolate-dipped heart-shaped Rice Krispies
Everyone young and old can’t turn down Rice Krispies. And who in their right mind would turn down a heart-shaped chocolate-dipped sprinkle Rice Krispie treat?!

You can use any recipe that you have to make the Rice Krispies. I placed my completed mixture in a large casserole dish and immediately after I began to use a large heart shaped cookie-cutter. It is easier to do it when they are warm, making it easier to cut through the mixture. You can make them as thick as your cookie-cutter allows you too!
Once you’ve completed that step all you have to do is use your favourite coloured chocolate candy melts and dunk them or drizzle them however you’d like! I decided to add sprinkles to mine (remember to do this quickly before the chocolate dries!)
Yields approximately 10 large heart-shaped treats. This will vary depending on how large of a cookie cutter you use!

Having a bit too much fun in the kitchen with one of my favourite childhood treats!

Sweet Treat #3: Conversation Heart Mini Cheesecakes
The iconic Valentine’s Day conversation heart candies were the inspiration for my final treat!

I decided to go with a cheesecake recipe that requires you to bake the mixture but it’s perfectly fine for you to go with a no-bake recipe if you have one!
To coloured my hearts I went for Wilton brand gel food colourings in purple, pink, green and yellow and left a couple plain white. I used regular red liquid food colouring to write the messages on top of the hearts.
I found heart-shaped silicone molds that were exactly the same that Wilton sells but for a fraction of the cost at Dollarama. I bought two of these molds and I had just the right amount of mixture to fill them entirely!
These molds make the perfect sized cheesecakes!
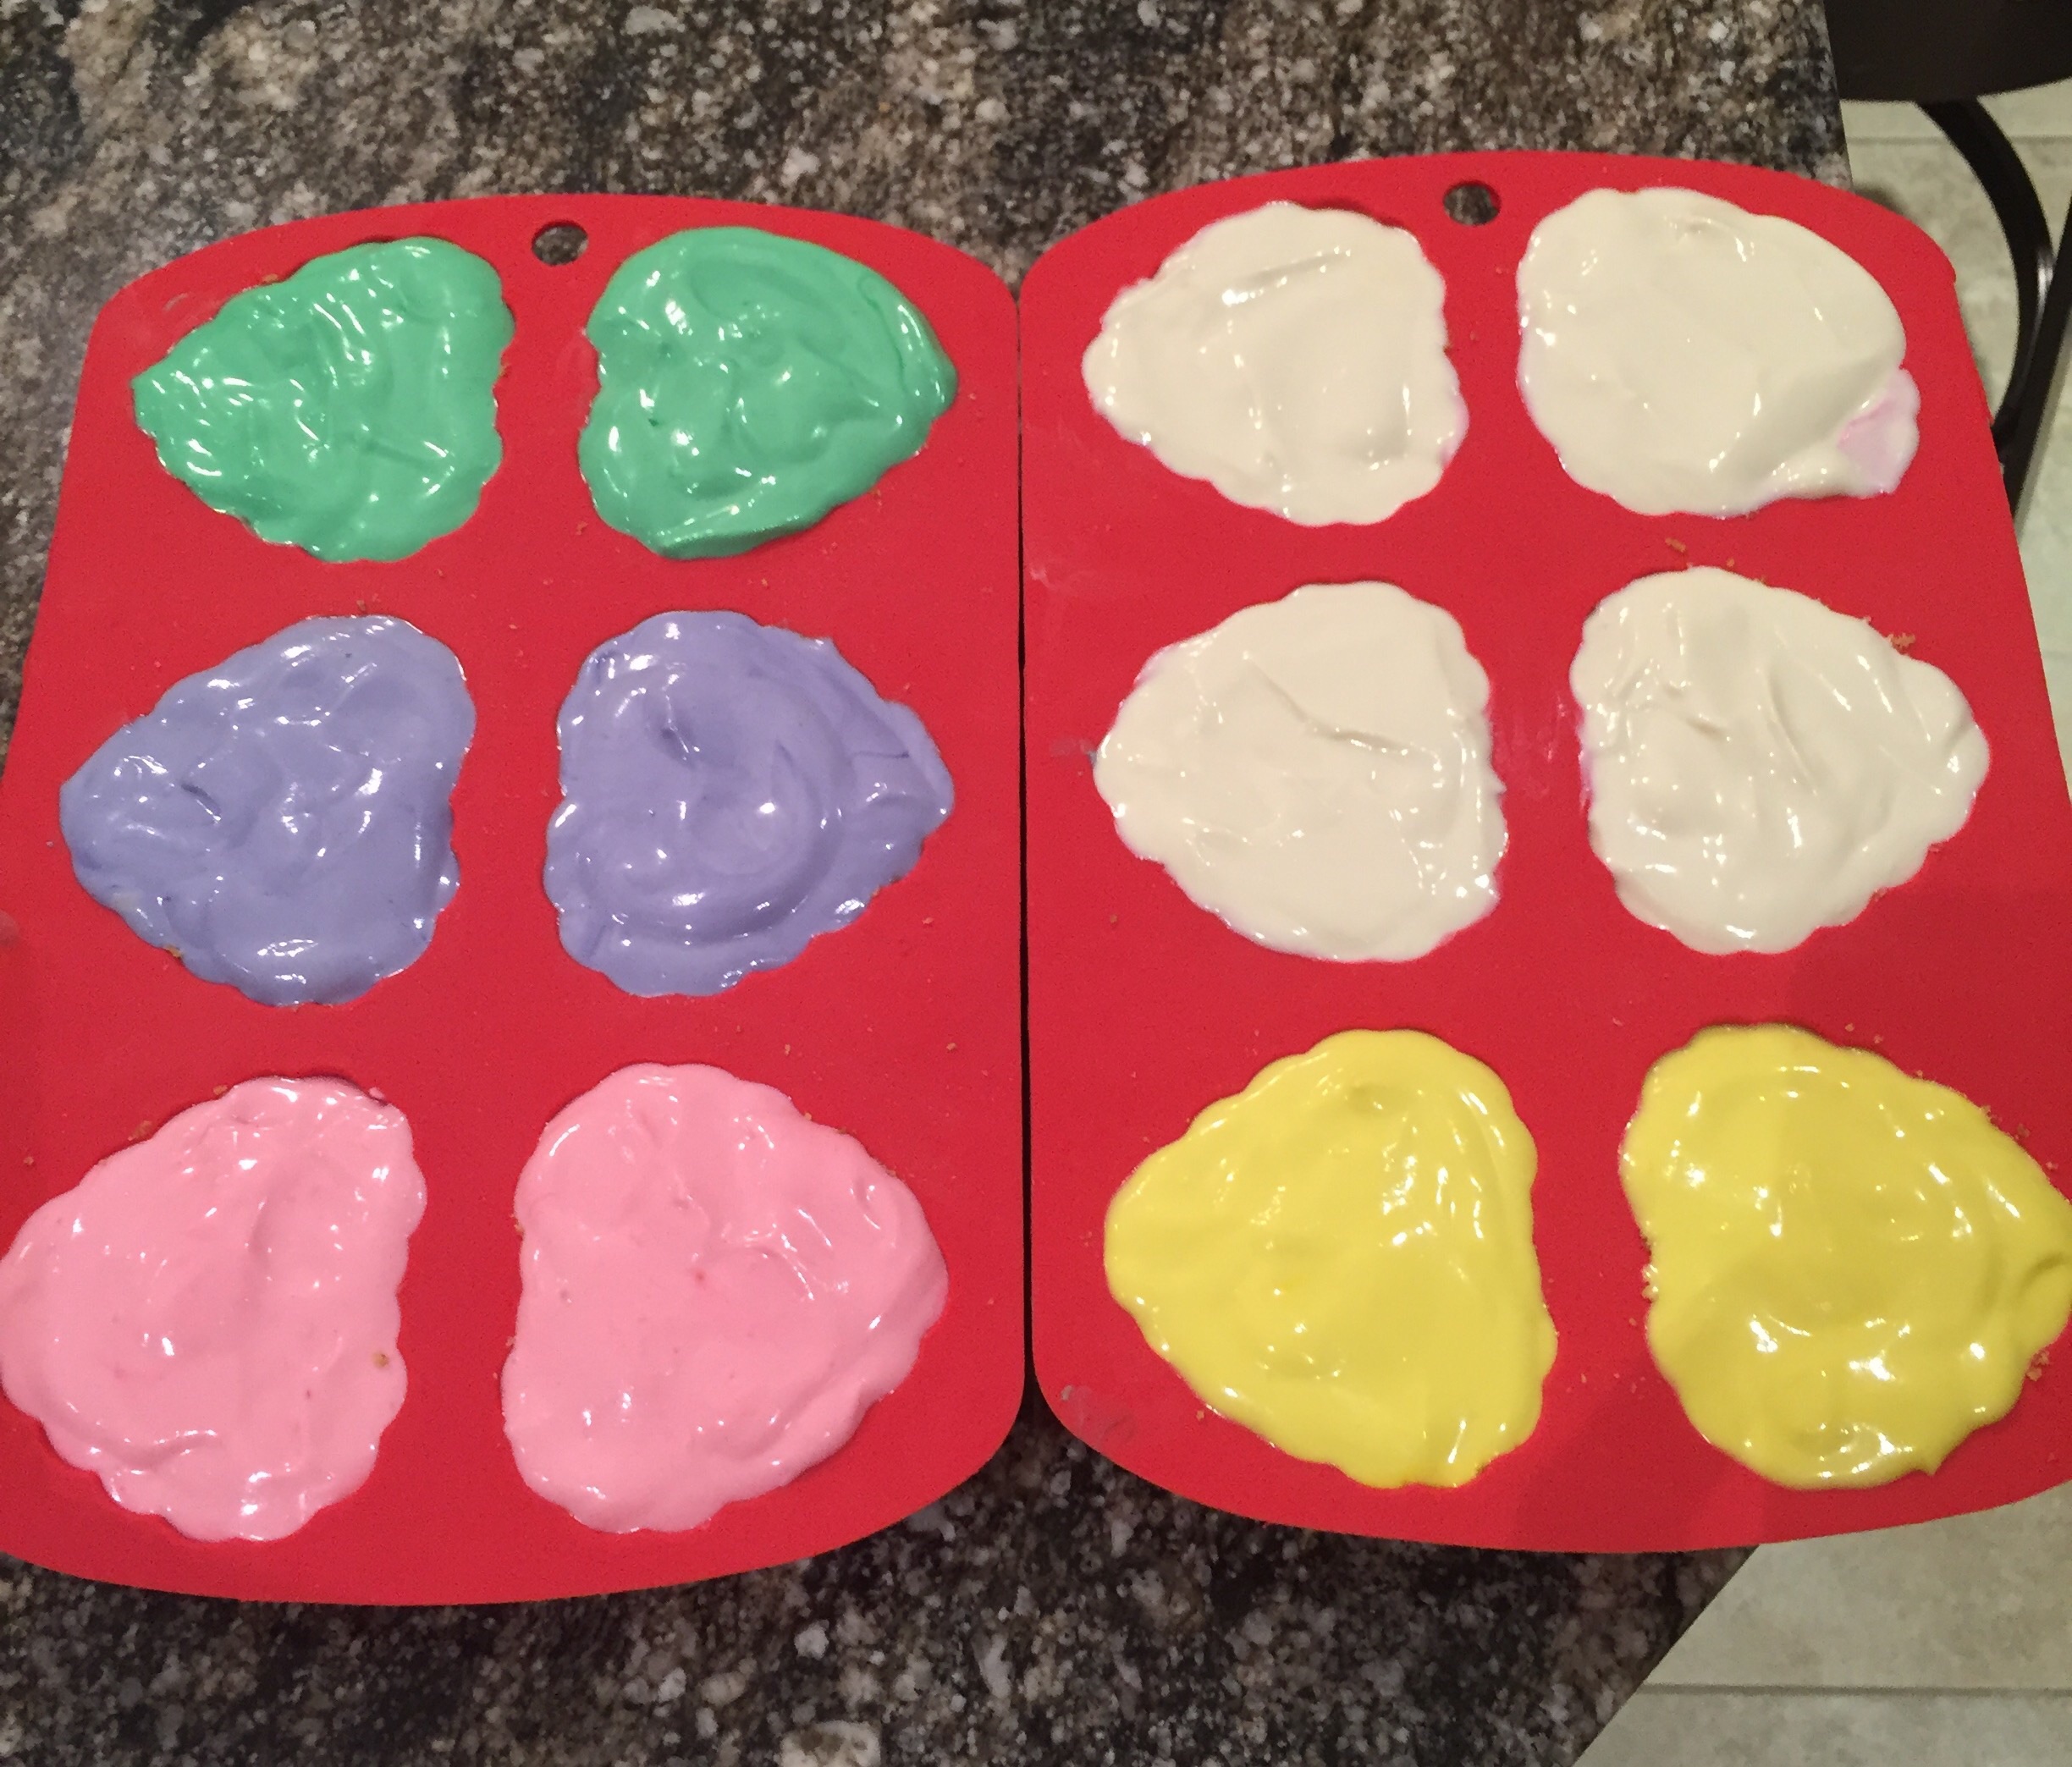
Ingredients:
* 1 cup of graham cracker crumbs (finely ground with a pinch of cinnamon)
* 4 tablespoons (1/2 stick) of butter, melted
* 16 ounces (2 blocks) of cream cheese, softened
* 1 cup of sugar
* 3 large eggs
* 16 ounces of sour cream
* 1 teaspoon of vanilla extract
* food colouring ( pink, purple, green, yellow, and red)

Supplies:

* Stand mixer or a mixing bowl and a hand-held mixer
* Rubber spatula
* Heart-shaped silicone molds
* Fine-tip paint brush
* Roasting pan large enough to fit your heart shaped molds

Instructions:

* Preheat oven to 325 degrees
* If you opt for a baked cheesecake you will need to make a water bath for it. Place your roasting pan in the oven filled with enough water to go approximately halfway up the sides of the heart molds. Allow the water to heat up while the oven does and bring some water to a boil in a kettle.
*Combine graham cracker crumbs, cinnamon, and melted butter. I used a food processor to grind the crackers then I mixed in the cinnamon and butter by hand until combined
* Spoon approximately 1 tablespoon of the crumb mixture into the bottom of eat heart mold. Press the crumbs down to ensure an even crust
* In a large mixing bowl, beat the cream cheese on medium high until smooth, scraping the sides of the bowl with a spatula as needed. You will also want to scrape off the extra cheesecake mixture from the mixing blade so that you have clump-free cheesecake!
* Add in the sugar and beat for 1 minute. Add eggs and beat until creamy, approximately 1 to 2 minutes once again scraping the bowl. Add the sour cream and vanilla and mix just until combined

*Equally divide the filling in separate bowls to colour them. Add food colouring to create the colours that you like.
* Pour the coloured cheesecake filling into the heart-shaped molds. Since cheesecake doesn't rise when baked you can fill them right to the top!

* Bake your cheesecakes in the water bath for 22-25 minutes (if making baked cheesecake)

* Remove your baked cheesecakes and allow them to cook at room temperature for about an hour.

* Freeze your cheesecakes for at least 2 hours (if not more). Remove from freezer and carefully push out your cheesecakes from the bottom. If they don't pop out easily they aren't done yet and will need to go back in the freezer for longer.

* To add the traditional conversation hear phrases squeeze some red food colouring into a small bowl. Using a fine-tip paint brush you can begin to write your messages on each cheesecake. Typically the says are printed in all capital letters. Don't worry if your words aren't perfectly centered, they typically aren't when they're printed on the candies.
* If you use too much food colouring your letters will bleed
* The food colouring will dry once you place your cheesecakes back into the refrigerator or freezer for a while.
These cheesecakes can be stored for up to several days or in the freezer for about a month!
These were definitely my most favourite and most fun to make/decorate of all my treats!
Here’s a few pictures of my final products all finished and ready to be delivered to my special Valentine! XOXO

