Pastel Pink Candy Apples & Halloween Bar Cart

Pastel Pink Candy Apples & Halloween Bar Cart

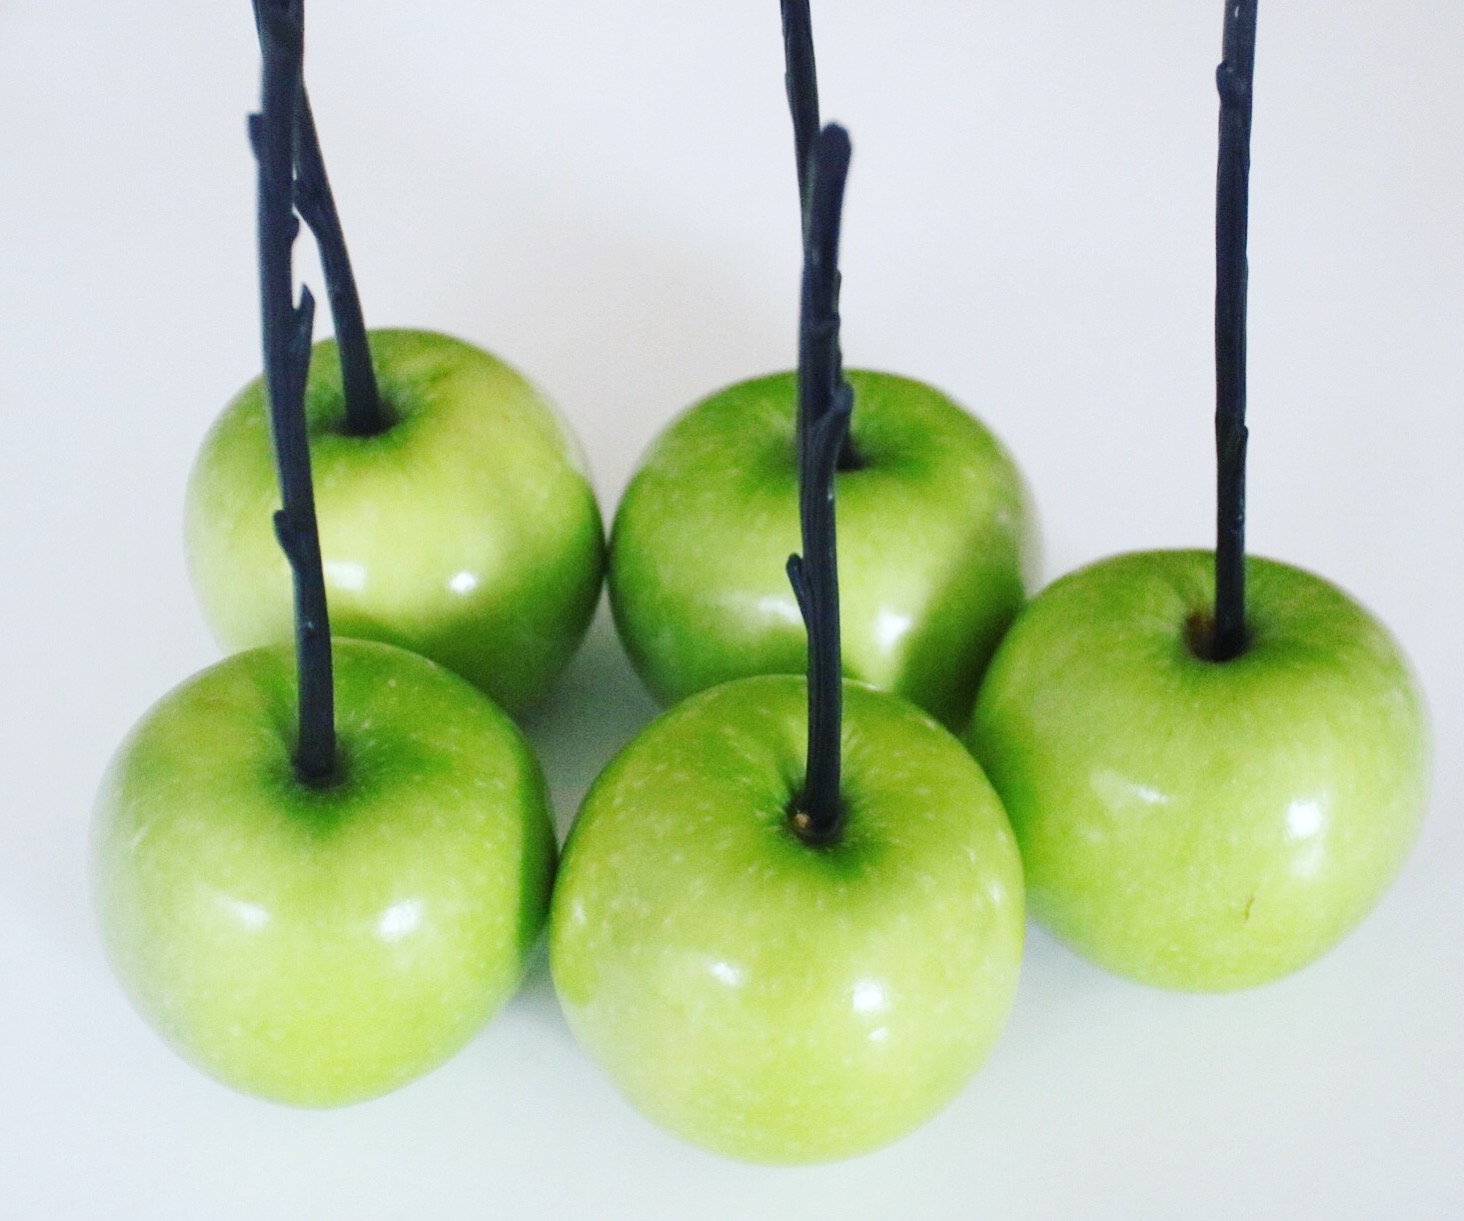
What’s better than candy apples you ask? Pastel pink candy apples of course! You won’t feel as guilty indulging in these treats after all, they’re made of fruit so they’re partially good for you, right?! You will definitely want to add these to your Halloween desserts when you find out just how easy these are to make!

IMG_2053

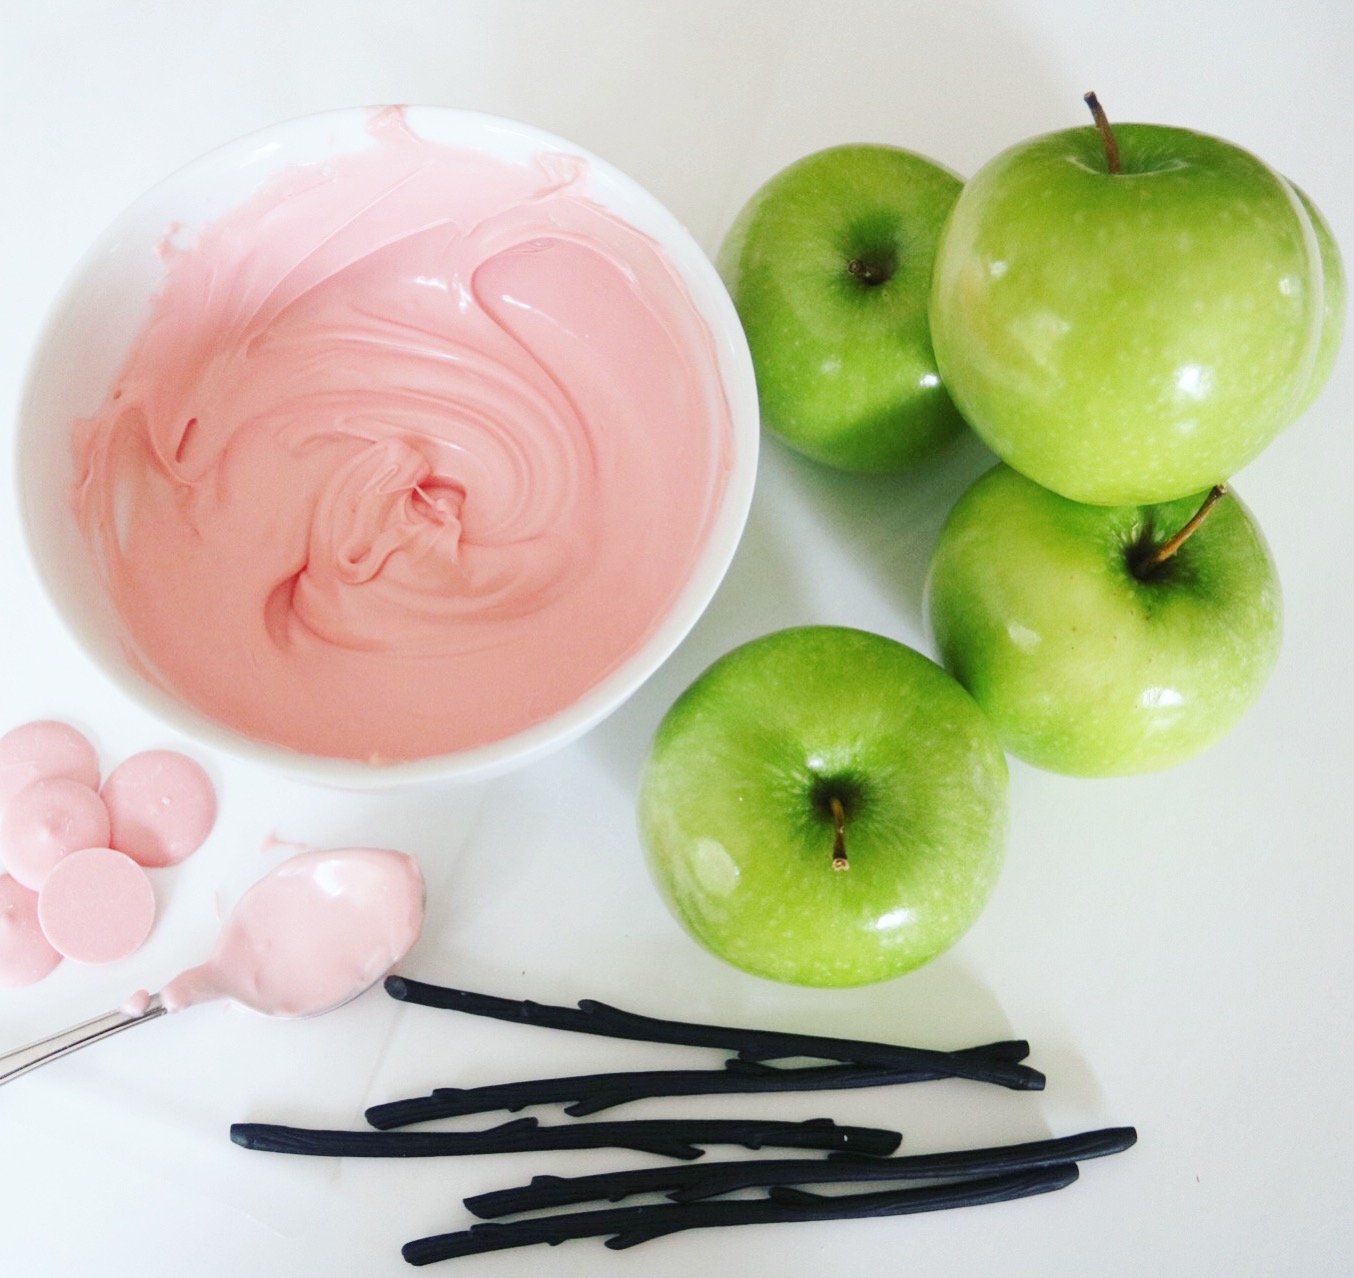
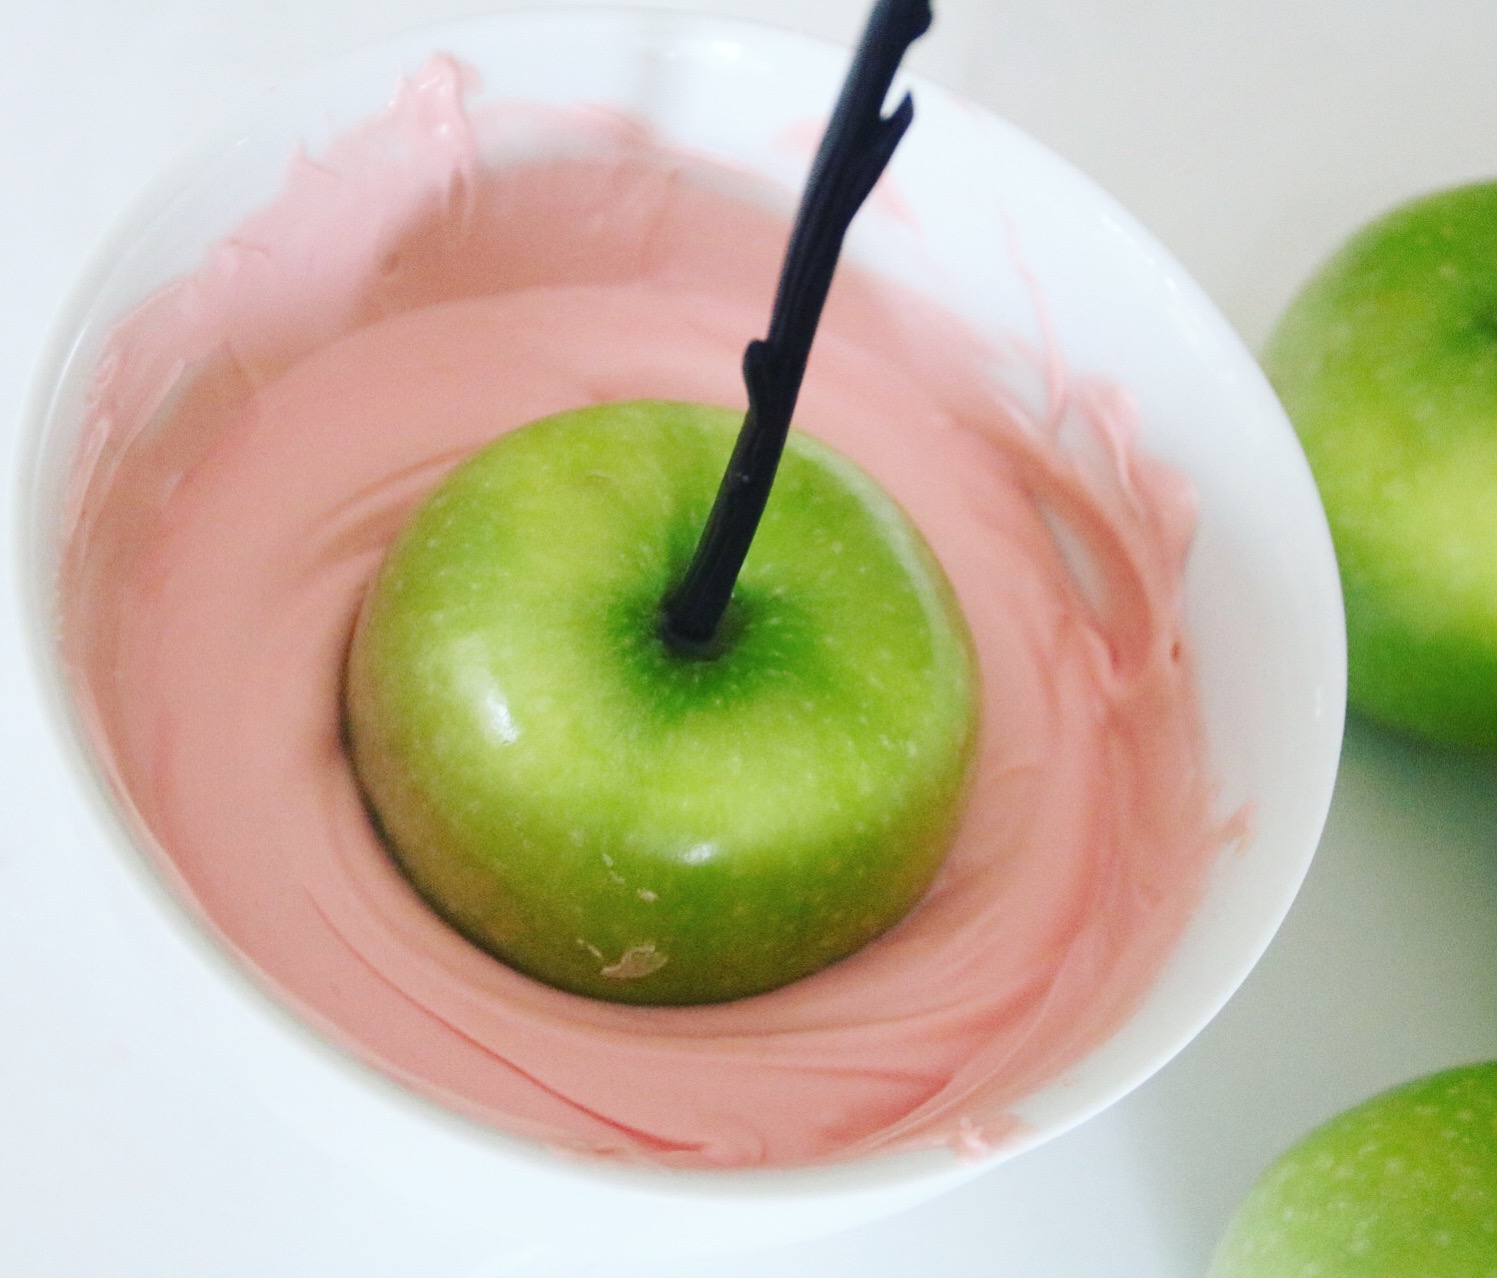
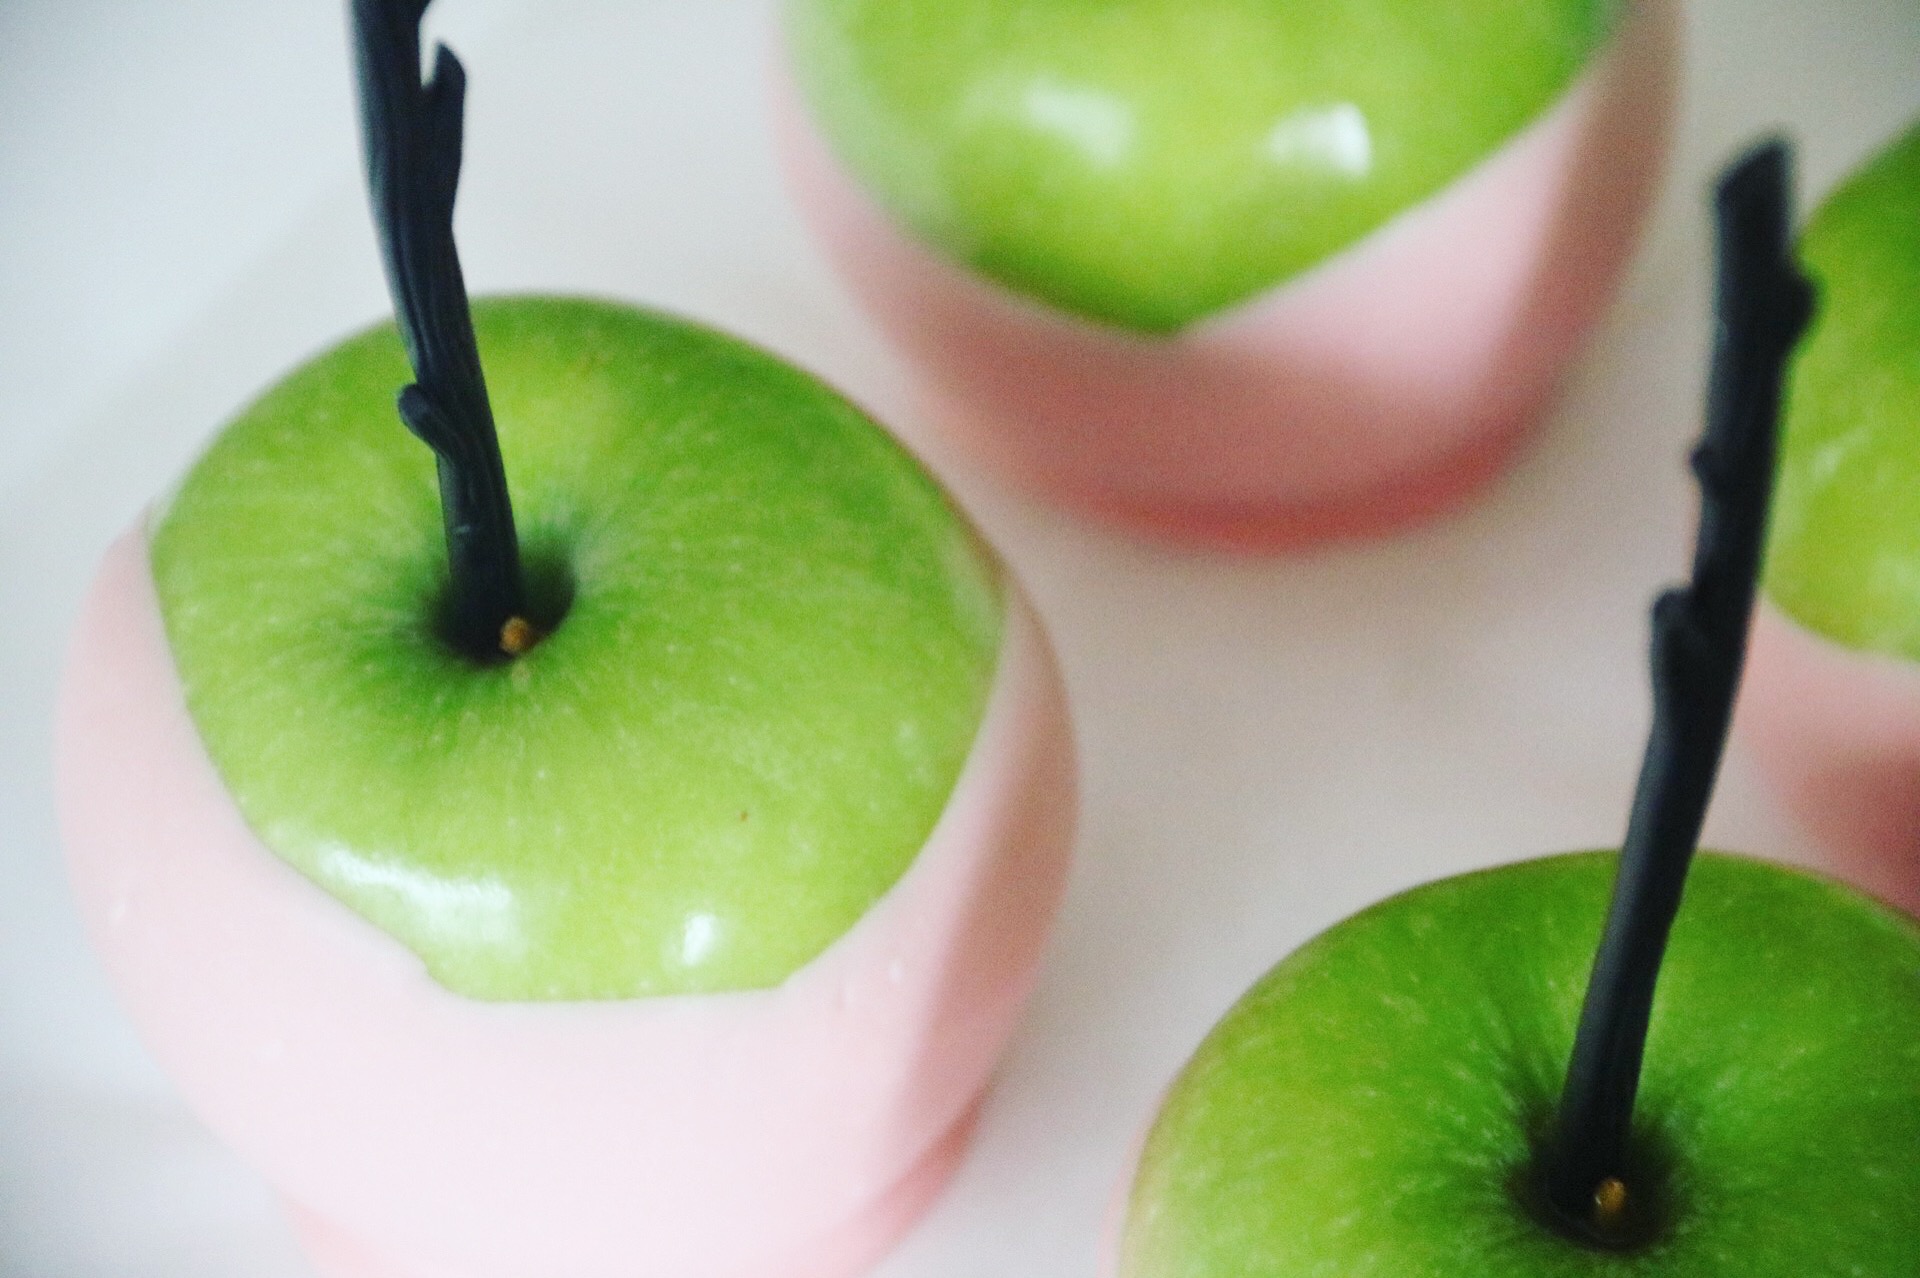
Traditional candy apples are made up of a mixture of corn syrup, water and sugar that are boiled until they’re the perfect and sticky consistency for dipping. MAJOR TIME SAVING HACK: use candy melts (available at Michaels and Bulk Barn), melt them in the microwave or double- boiler on the stove, dip your apples, and VOILA! Just like that, in a few minutes you will have beautiful “candy” apples!

What you’ll need:

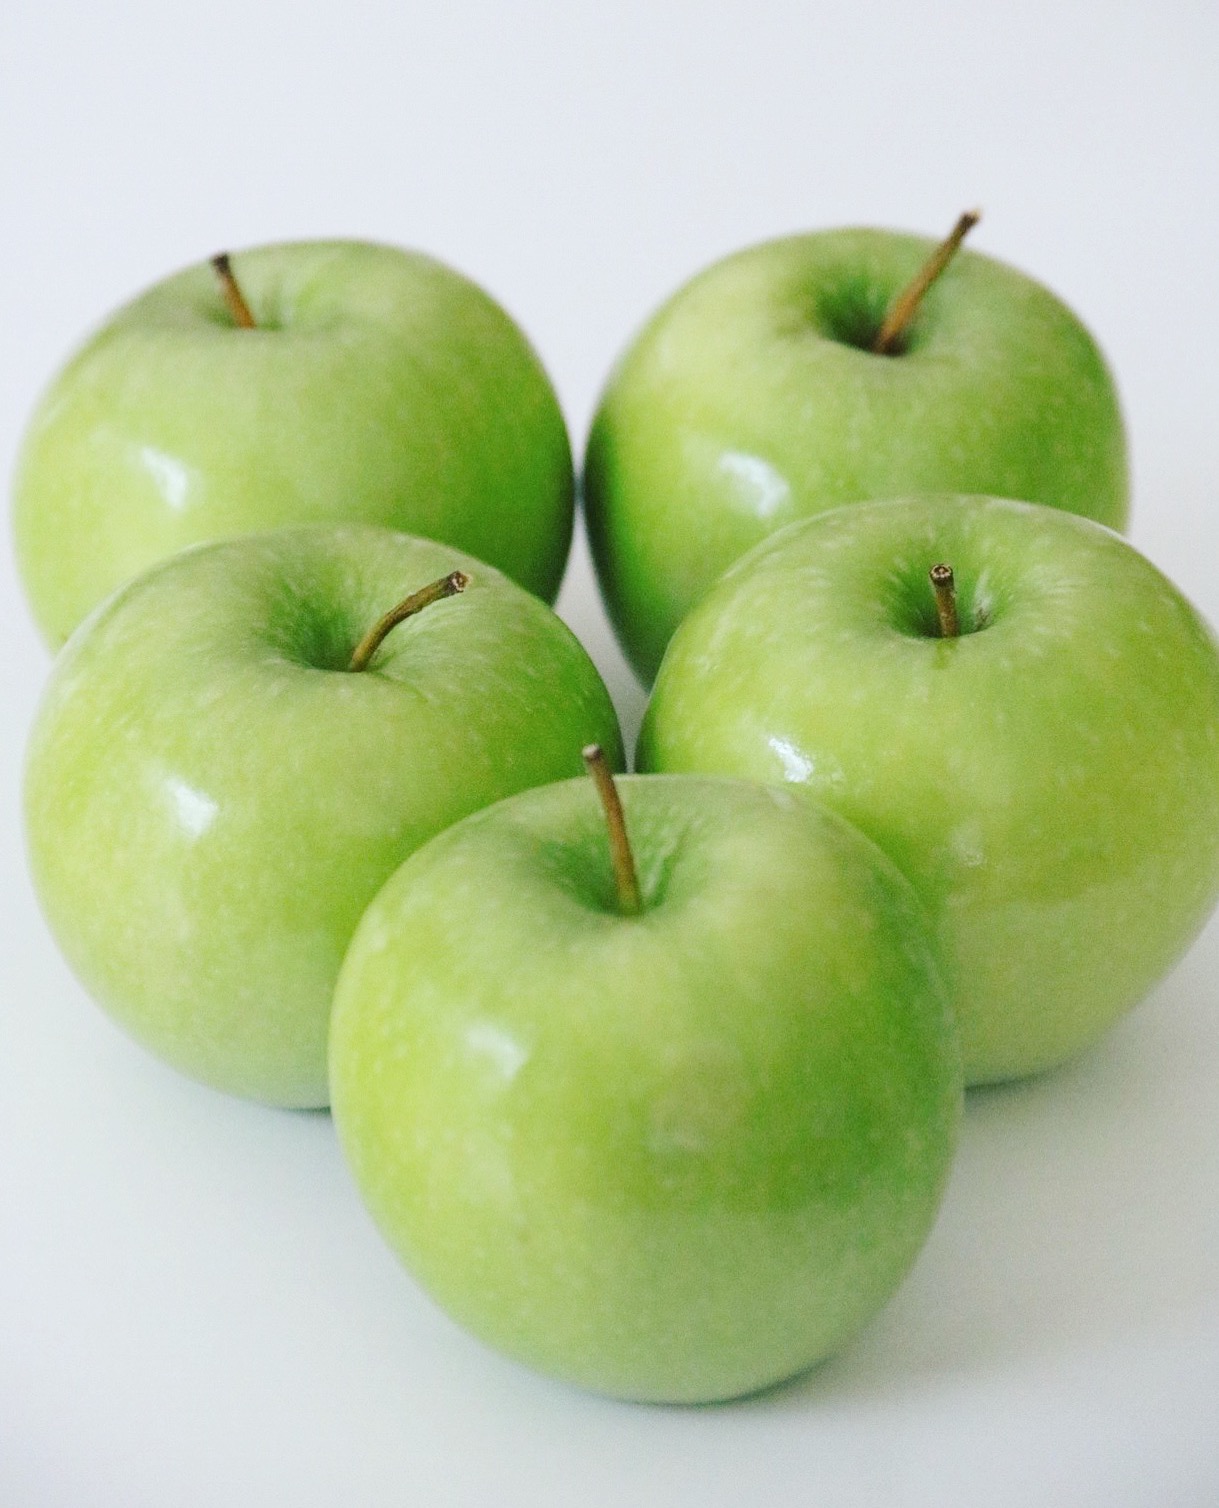
*Green Apples, plastic twigs (I got mine from Michaels), you could use real ones, or candy apple sticks

Candy Melts (in the colour of your choice) + any other sprinkles or toppings you want to put on your apples

Wax Paper (once your apples are dipped place them on wax paper for easy removal)

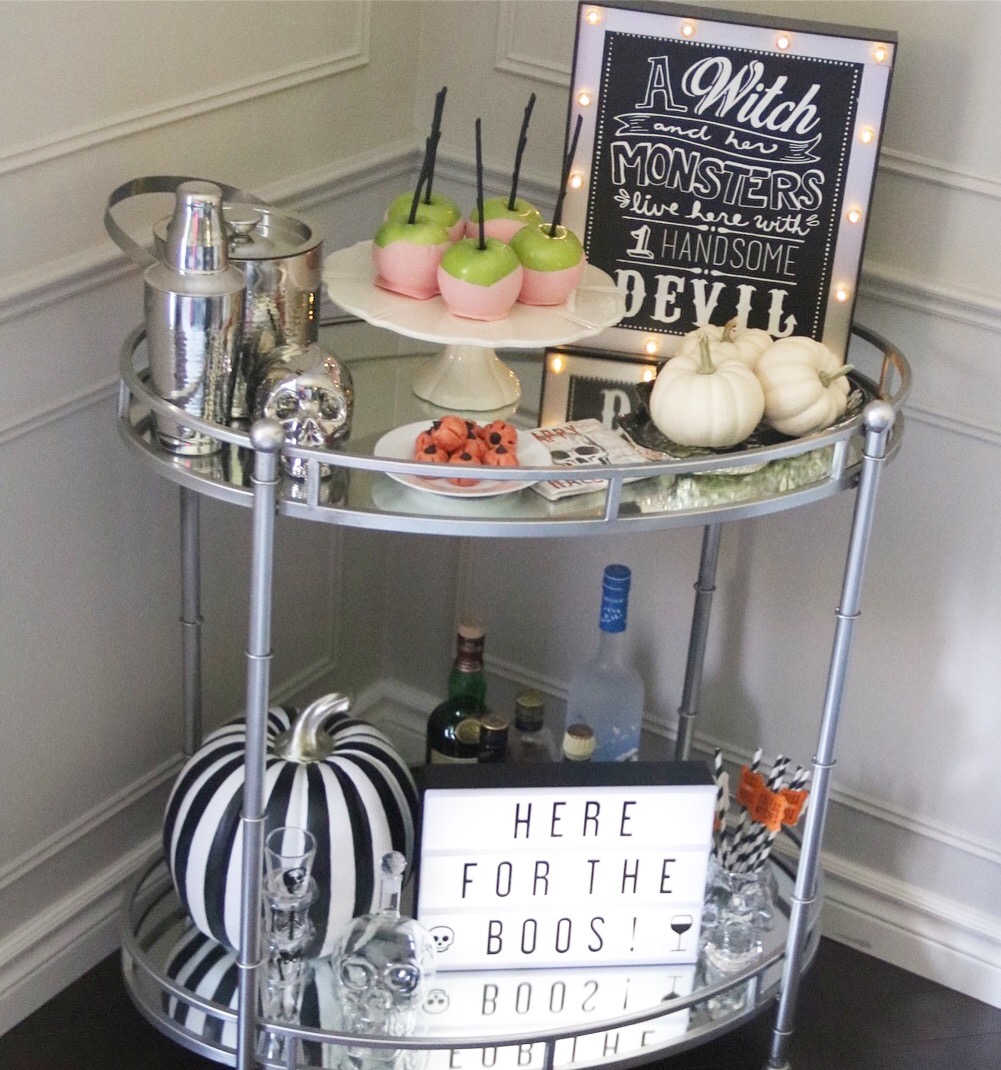
Cake stand or platter to display your beautiful apples!


IMG_2036IMG_2037IMG_2038IMG_2039IMG_2040IMG_2041IMG_2042

IMG_2046

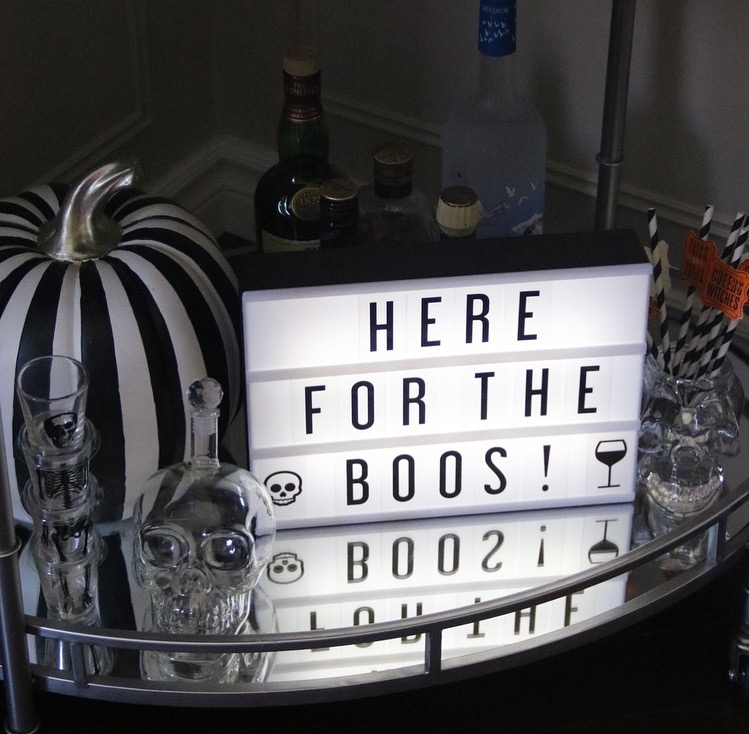
Every holiday or special occasion I style my bartcart, it is so much fun to do and you can really get as creative as you want with it!  This year I used the apples as the centerpiece and went from there with decorating the rest. I opted for a black and white theme which really made the pink apples pop!

IMG_2051

Here’s a look at my final styled bar-cart, how cute do the pop of pink apples look on here?!

IMG_2334IMG_2331IMG_2327IMG_2328IMG_2329IMG_2330IMG_2333

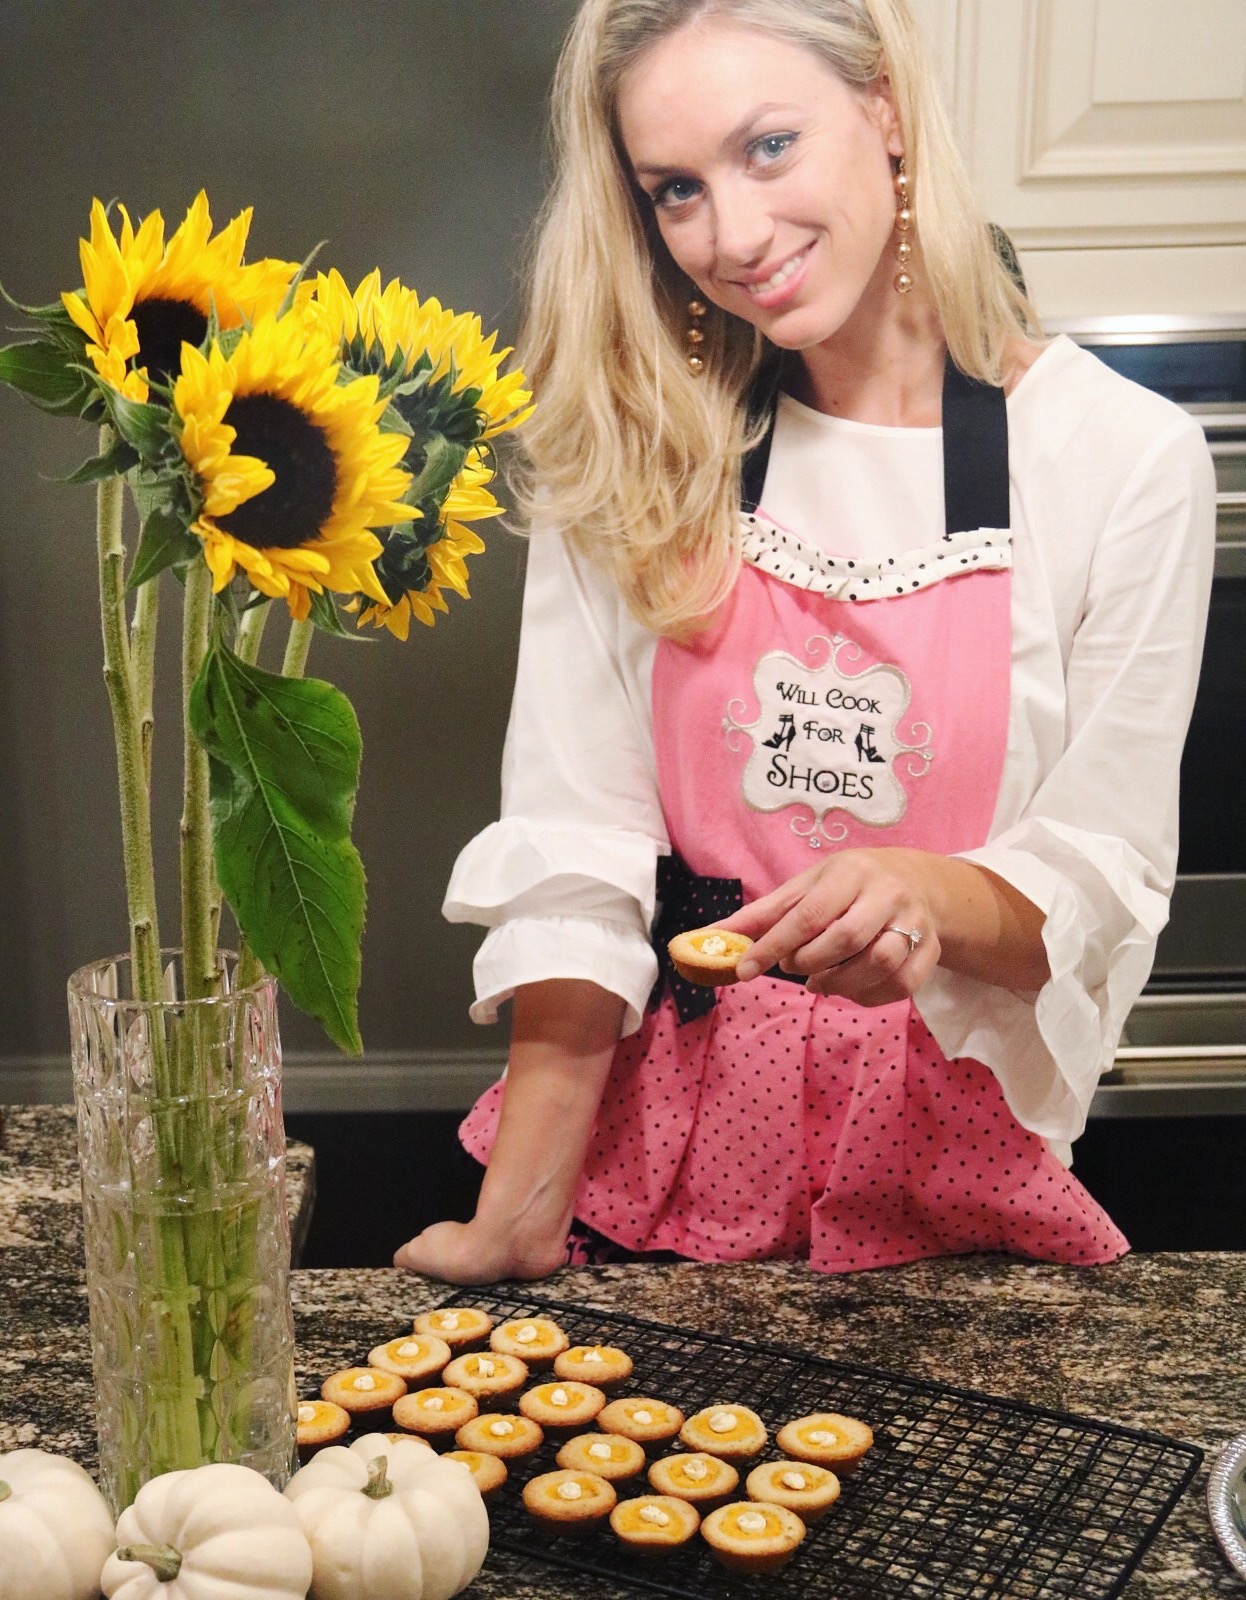
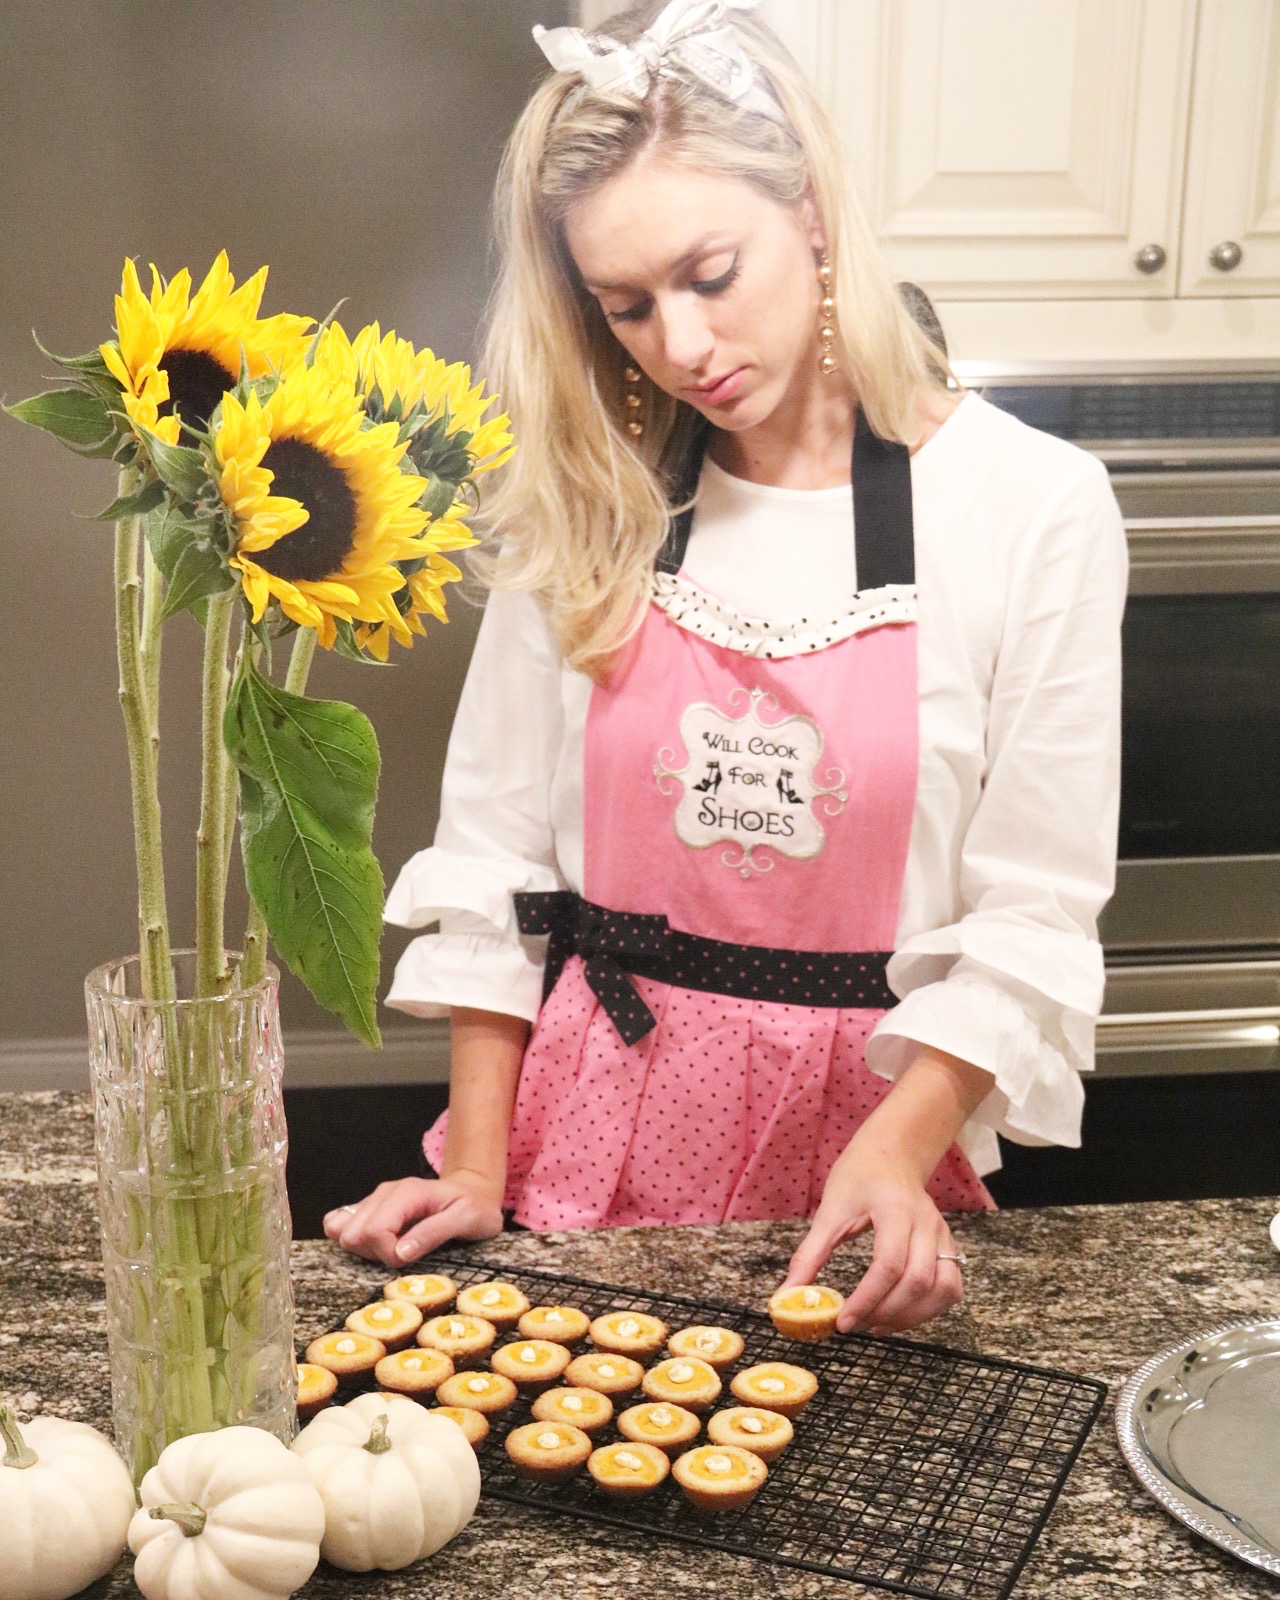
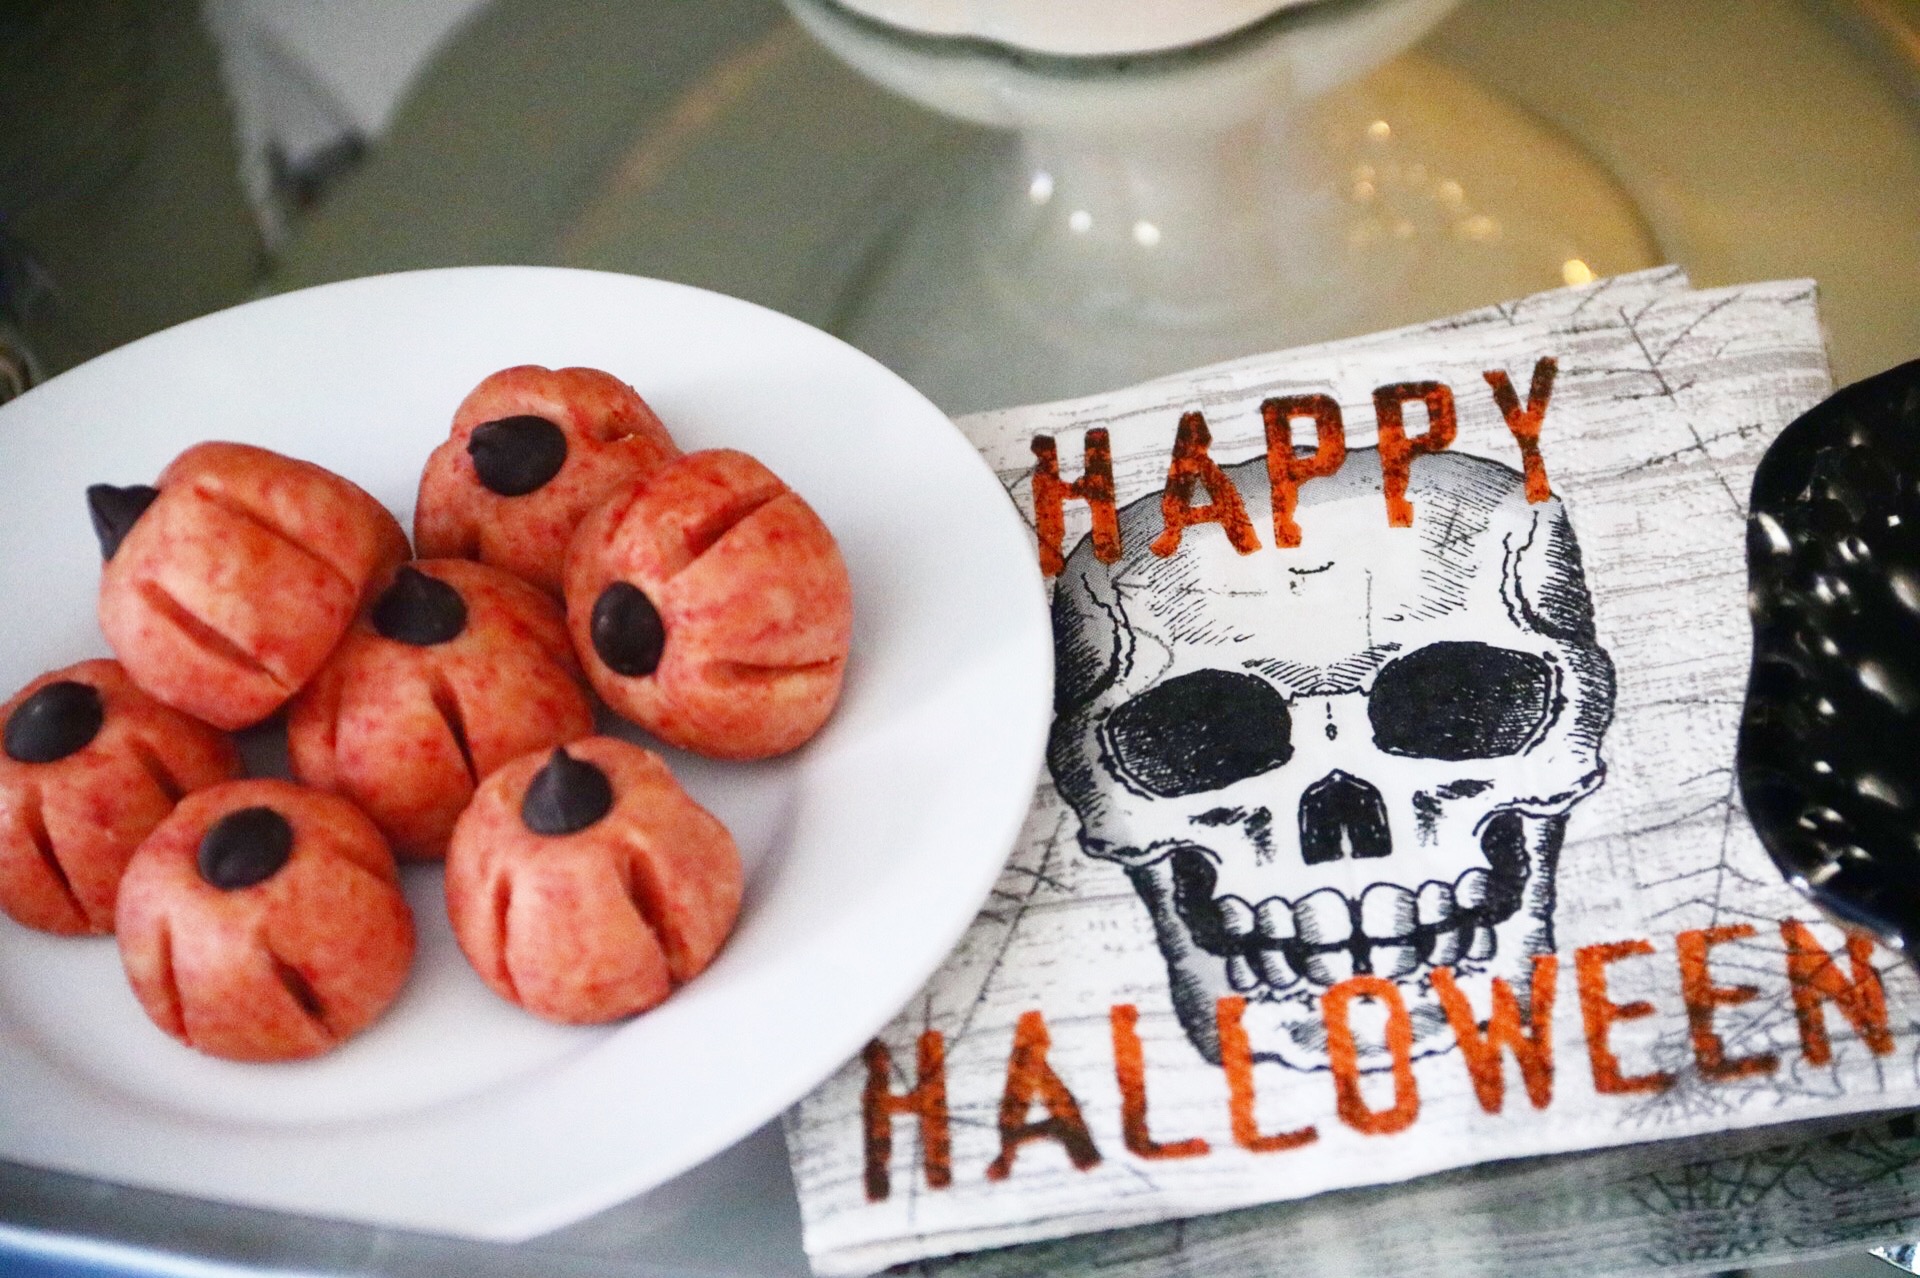
These 3- ingredient pumpkin bites were a huge hit! All you need is peanut butter, softened butter, icing sugar, and a little bit of food colouring! Top with a chocolate chip and use a toothpick to make the indents and you’re all set! IMG_2297IMG_2296IMG_2295

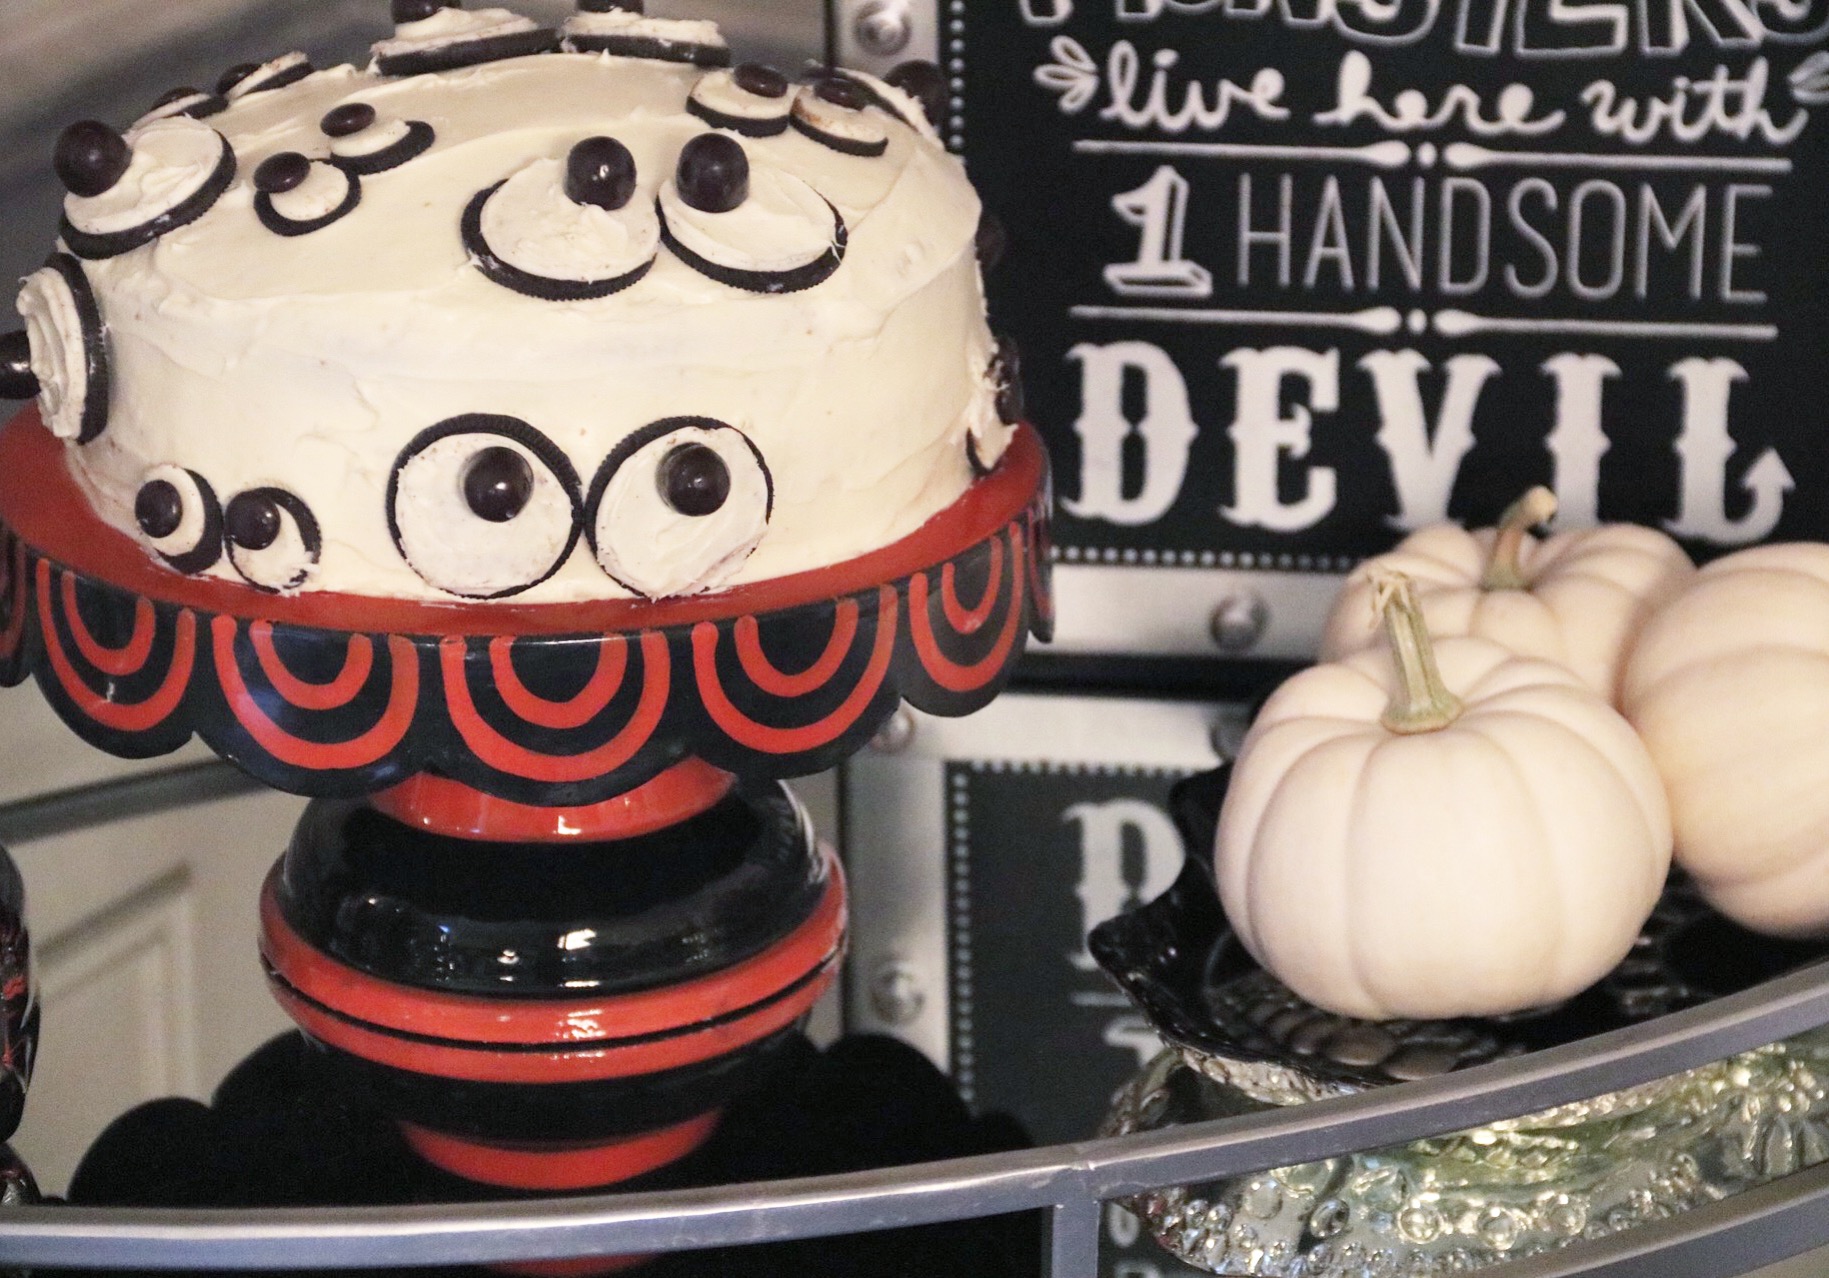
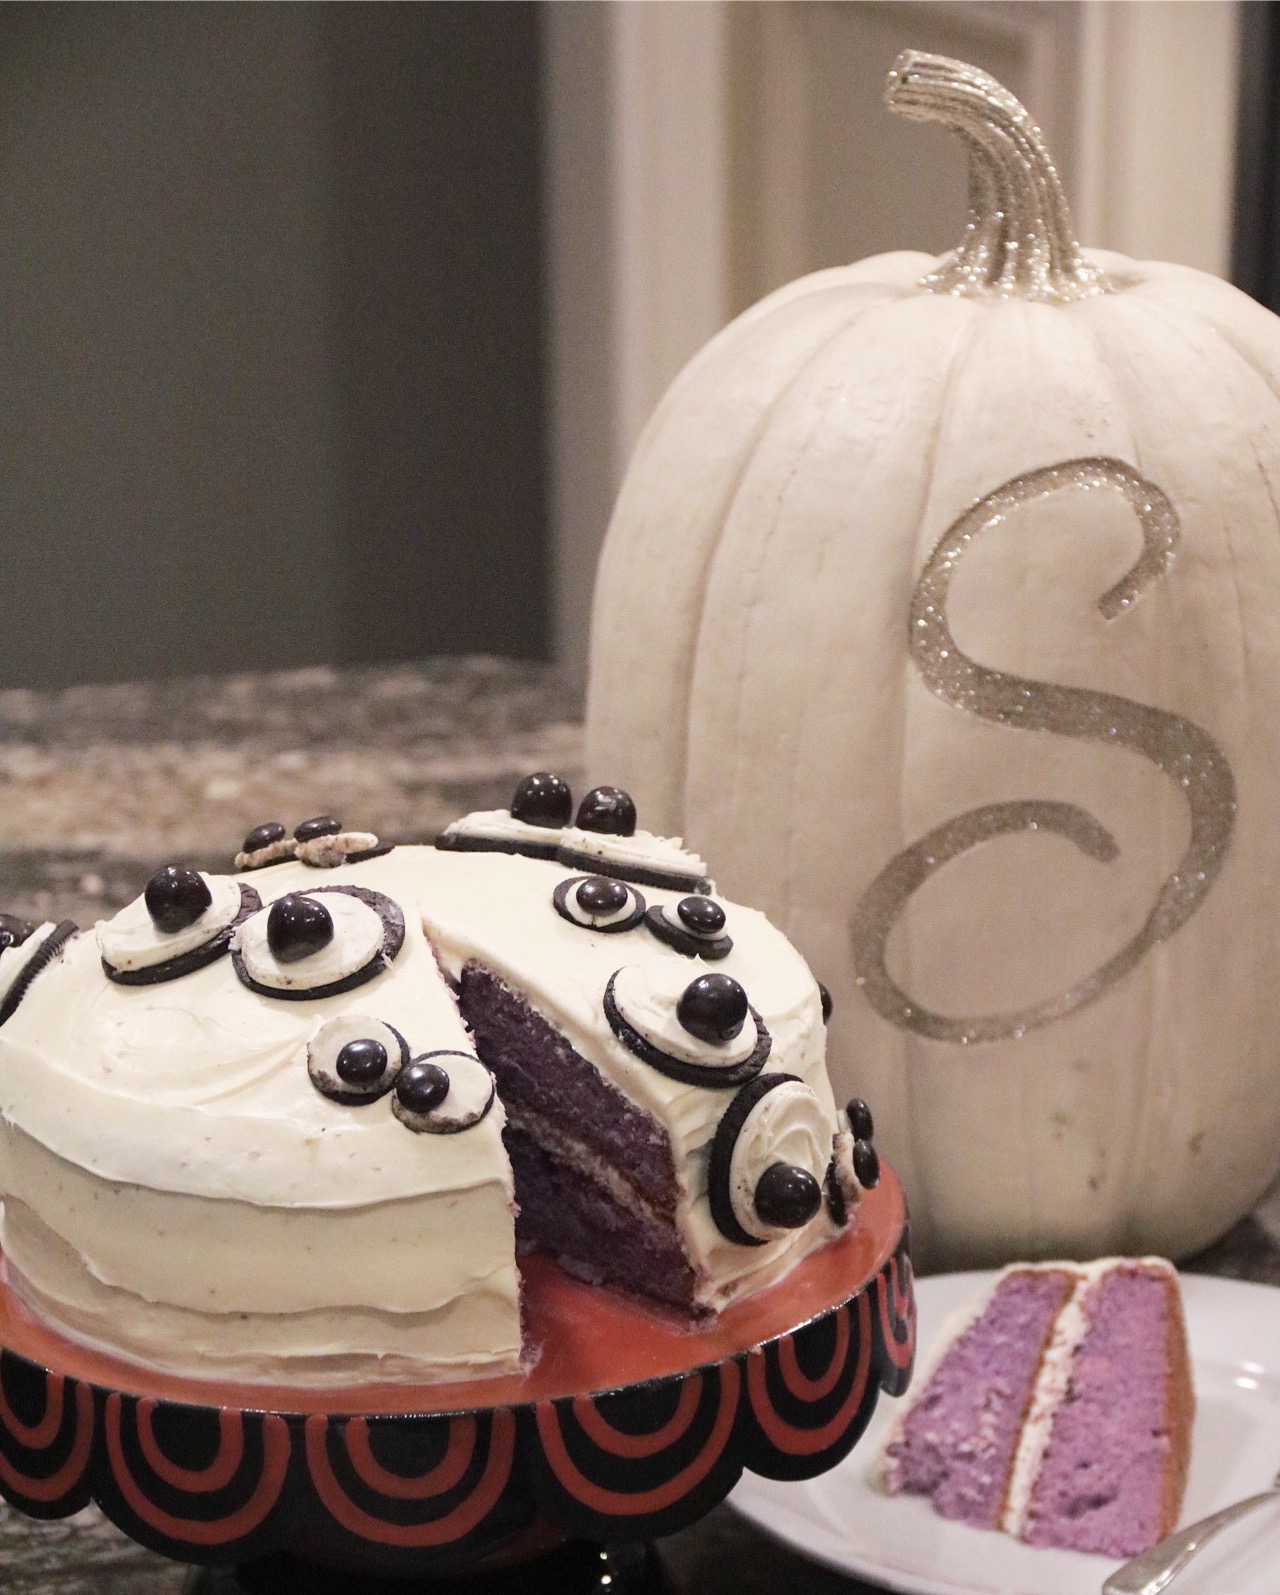
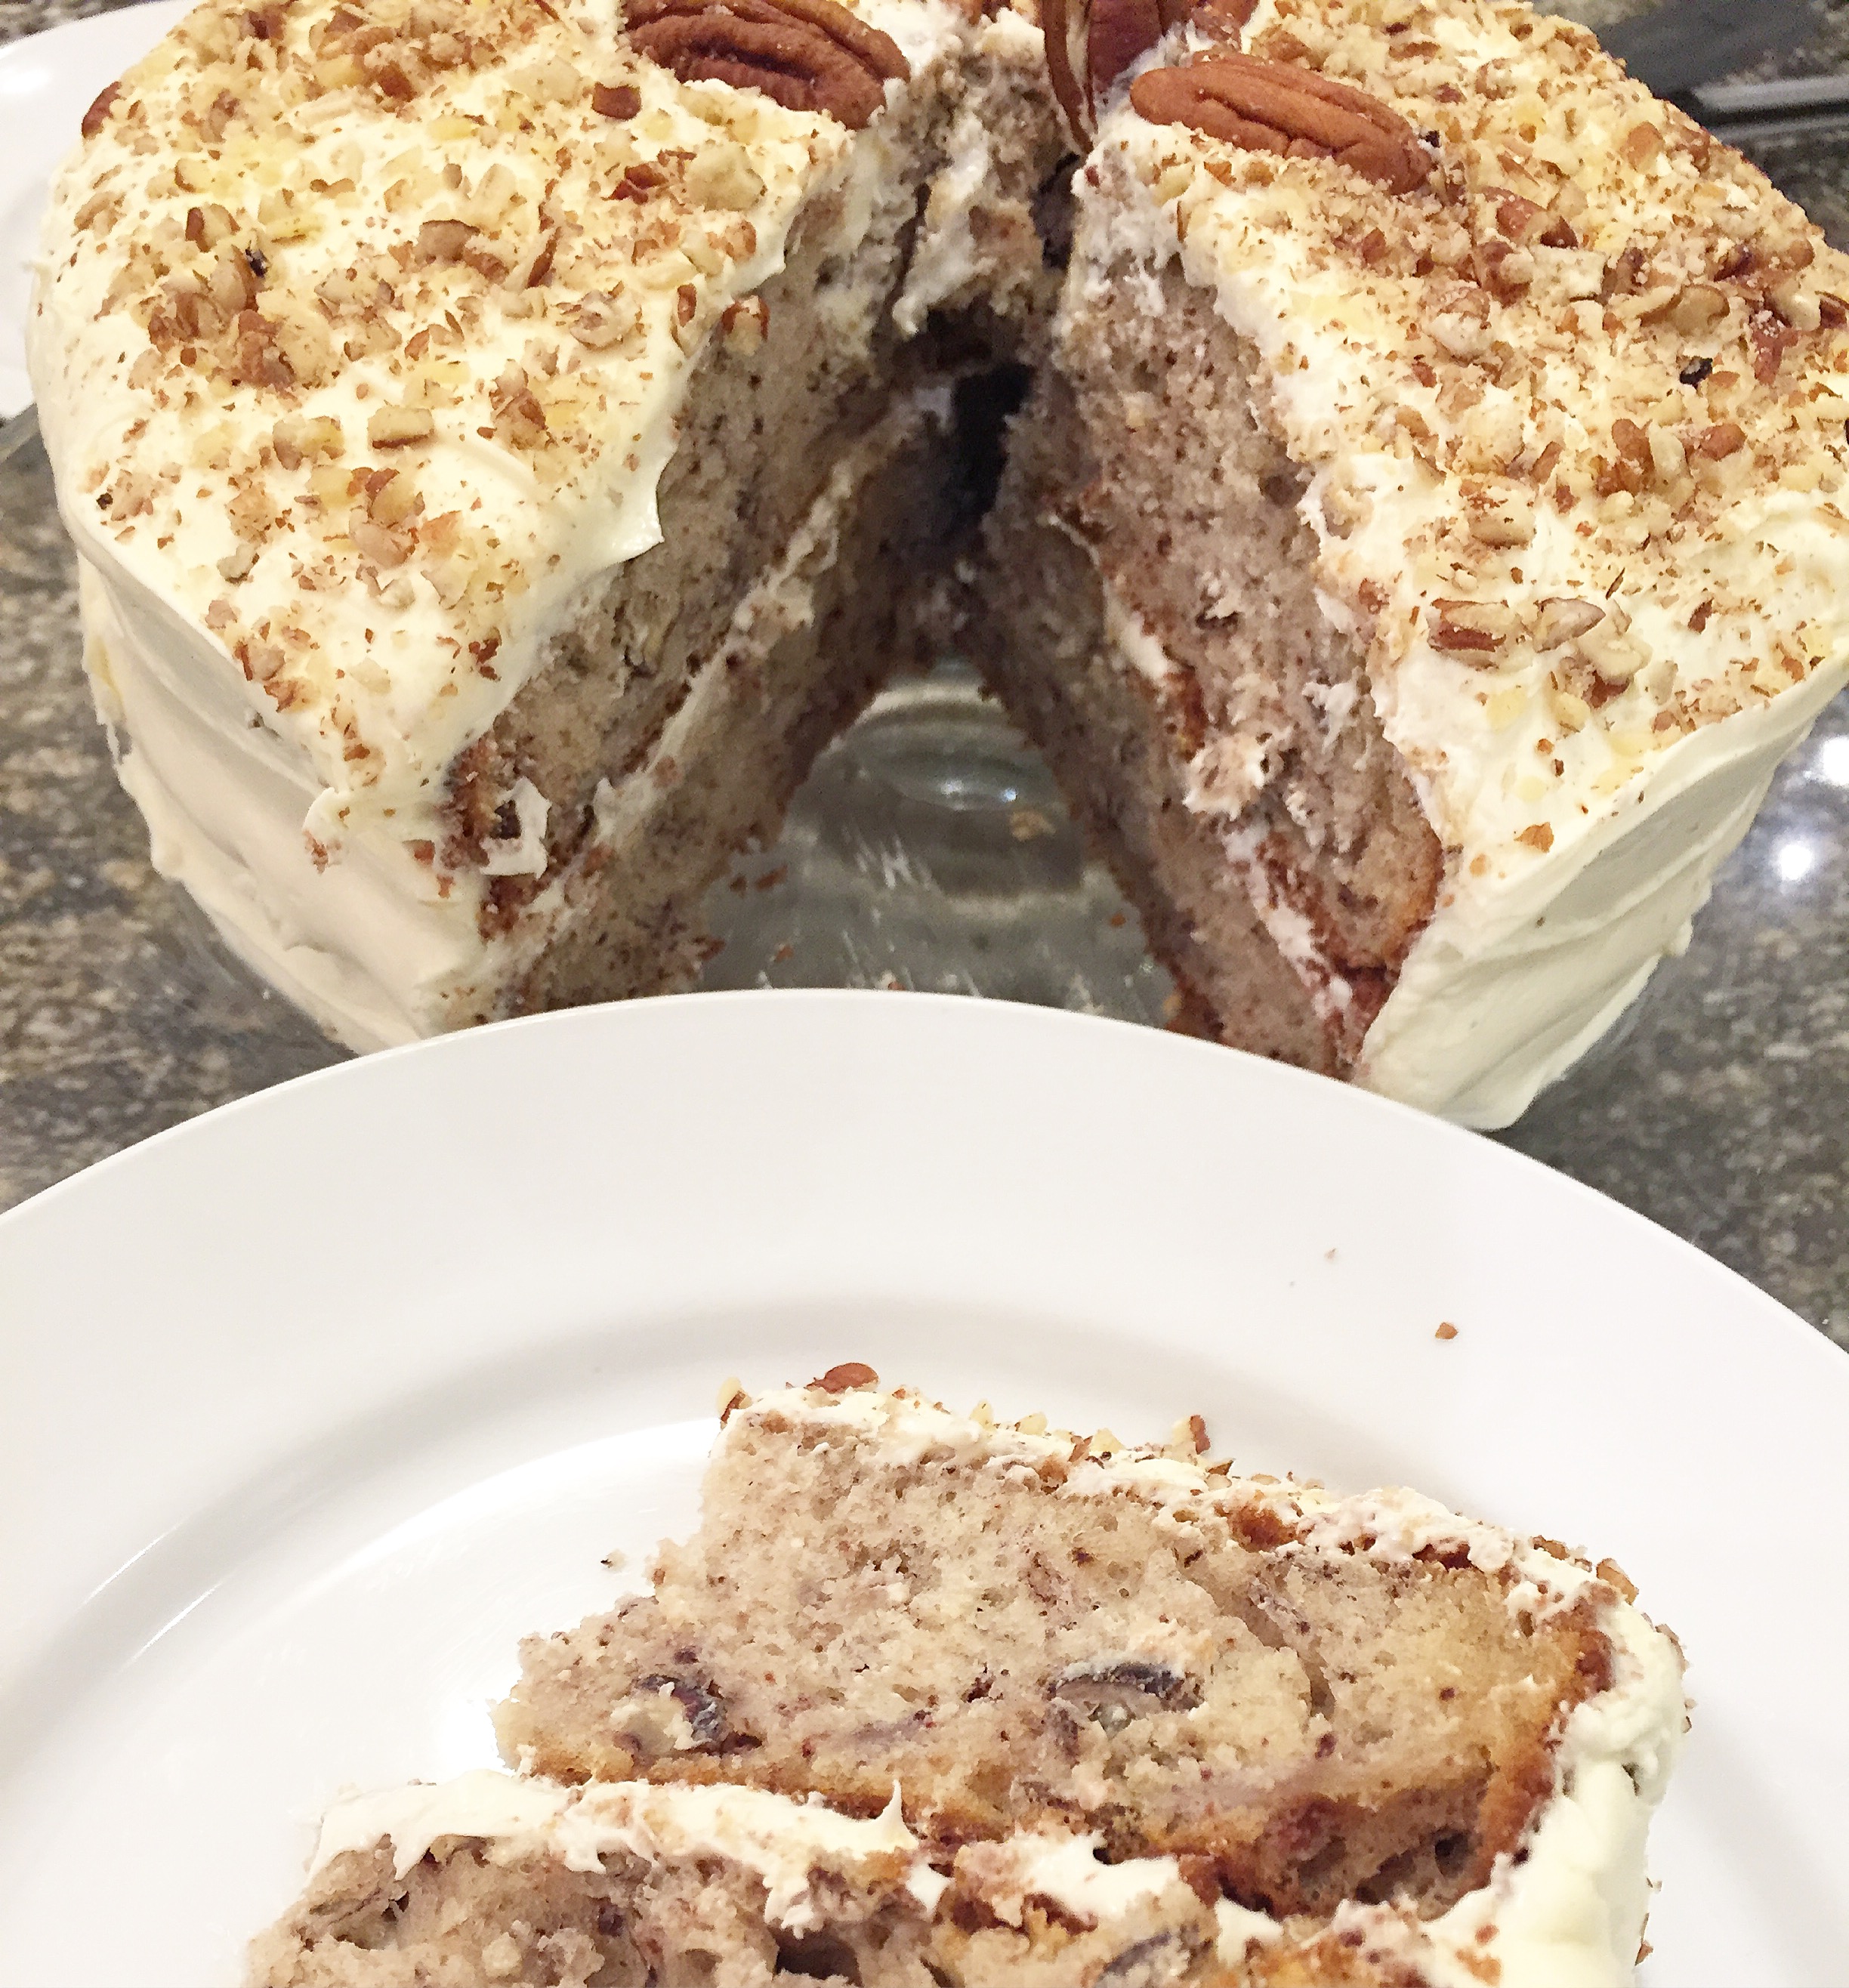
Here’s my second styling- I kept with the black and white theme and made a simple vanilla cake with Oreo (eyes) and a surprise purple colour inside!

IMG_2255

IMG_2253IMG_2252IMG_2251IMG_2250IMG_2286

Mini Pumpkin Pie Sugar Cookies

Mini Pumpkin Pie Sugar Cookies

Nothing says Fall or Thanksgiving quite like pumpkin pie! These little sugar cookies pack a huge bite of the pumpkin pie you know and love. The added hint of cream cheese is the icing on top of a perfect pie!

FullSizeRender

IMG_1879IMG_1878IMG_1864IMG_1862

Prep- 40 minutes Total-1 hr 25 Serves-36

Ingredients
Cookie Base
• 1 package of Betty Crocker™ sugar cookie mix
• Butter and egg as directed on cookie mix package

Pumpkin Filling

  • 1 brick of cream cheese, softened
  • 1/4 cup canned pumpkin purée (not pumpkin pie mix)
  • 1/4 cup of granulated sugar
  • 3/4 teaspoon of pumpkin pie spice

Topping

  • Betty Crocker™ cream cheese frosting

Directions

  1. Preheat oven to 350°F. Spray muffin tins with non-stick spray (I used mini ones).
  2. Make the dough as directed on the package.
  3. Press approximately 1 1/4 inch balls evenly into the bottom of the pan going slightly up the sides. Make a deep enough well so you the pie filling fits inside.
  4. Mix Pumpkin Filling ingredients in s medium sized bowl with a whisk until smooth.
  5. Spoon a small amount into the each cookie filled muffin tin and spread evenly.
  6. Bake 8 to 12 minutes or until edges are a light golden brown and the filling has set.
  7. Both the cookies and the filling will be soft, let cool for 10 minutes in the tin.
  8. Very carefully remove and place on a wire rack to cool and harden.
  9. Using a small plastic bag, add cream cheese frosting and cut a small piece from the tip of the bag. Pipe a small amount onto each pie and sprinkle lightly with pumpkin spice.

*Refrigerate the cookies in a container or wrapped in plastic wrap.

IMG_1875IMG_1873IMG_1871IMG_1868IMG_1863

Enjoy your minis, these are the perfect bite size treat to bring to the table for Thanksgiving!

xoxo,

Sara

Maple Bacon Cupcakes

Maple Bacon Cupcakes

Don’t go bacon my heart!

IMG_7593

These sweet and salty cupcakes are sure to please any crowd! I whipped up a batch of these for Canada Day, since they included two Canadian classics (maple and bacon!) The moist maple cupcake, topped with vanilla icing with a drizzle of maple syrup and bits of crispy bacon will have you wanting more and more!

IMG_7598

IMG_7603

You eat bacon for breakfast, so these are basically a breakfast item right?

The bacon dessert trend hit the food scene a few years ago and continues to be added to a number of sweet treats, so I decided to take a run at it! Maple and bacon have always been a match made in heaven, so there were high hopes for these cupcakes!

IMG_7594

Making these cupcakes was my very first encounter using bacon in dessert. I was excited to hear and see what everyone thought of them. The reviews were good and everyone loved them!

IMG_7596

PREP TIME
20 mins
COOK TIME
18 mins
TOTAL TIME
38 mins

Ingredients:

Cupcakes:

  • 1 box of white cake mix (I cheated because hey, these recipes are perfected so why mess with a good thing?)
  • eggs
  • vegetable oil- use half, half bacon grease
  • bacon grease (grease from cooking bacon in a pan)
  • 2 Tbsp maple syrup
  • Optional: 1 tsp of maple extract

Frosting:

  • 2 containers of white frosting (also cheated on making this from scratch)
  • 2 Tbsp of maple syrup

Topping:

  • maple syrup, to drizzle over cupcakes
  • 6-8 crispy bacon strips cut into small pieces
Instructions:
  1. Preheat the oven to 350 and line a muffin pan with cupcake liners. (I used Canada Day themed ones on this occasion)
  2. Combine ingredients as stated on the box + the bacon grease, and maple syrup (and maple extract if you’re included that.)
  3. Start pouring mixture into cupcake liners filing just over halfway.
  4. Bake for 18-20 minutes.Take out of the oven and let them rest for 5-10 minutes.
  5. Let the cupcakes cool completely before frosting! (important step or you’ll get runny icing– speaking from experience.

Frosting:

  • Transfer your maple frosting into a piping bag using the piping tip of choice.
  • Crumble crispy bacon on top and drizzle with maple syrup!
  • Add festive little touches like Canadian flags, etc.

VOILA!

IMG_7599IMG_7600IMG_7597IMG_7595

I will definitely be making these again, they were super simple and stayed really moist from the bacon grease added to the mix!

IMG_7592

Rainbow Grilled Cheese

Rainbow Grilled Cheese

Last summer rainbow grilled cheese took the social media world by storm! I first tried one at the Canadian National Exhibition in Toronto and decided one day I would make my own!

That day has finally come, I was not disappointed, and neither was my wallet when I saved $8 a pop by making one of these bad boys myself.

With St. Patrick’s Day just a day away, why not wow your friends with one of these!

IMG_2374

Find the recipe below for your very own goo-ey, “taste the rainbow” experience.

What you will need: 

1 cup of your favourite cheese (shredded). I used mozzarella.

3-4 different food colouring shades of your choice

4 slices of bread

2 tablespoons of butter

1 tablespoon of sprinkles for garnish. I omitted it this time around but DEFINITELY including it the next time!

DIRECTIONS

  1. Divide your cup of cheese into separate bowls and mix in food colouring.
  2. Heat up your pan to medium-high. While you wait, spread butter on one side of each of the 4 pieces of bread.
  3. Place the butter side down, align cheese (I went horizontal, next time I will go vertical so the colours come out better when pulled apart). Top with the other slice of bread (butter side up!) Grill until golden brown and cheese is starting to melt. Flip, and grill for 2 more minutes.
  4. Remove your grilled cheese from the pan, spread with a little more butter and top with a little, or a lot of sprinkles!
  5. Enjoy the magic!

IMG_2377

IMG_2373

The highly Instagram-able cheese pull…

IMG_2376


Banana Pecan Cake

Banana Pecan Cake

I always seem to have extra bananas lying around that are just waiting to be added to a recipe.

Instead of my usual use of bananas in banana bread I decided to add them to a cake using cake mix from the box (secret’s out!)

This recipe is so simple and you can even use it to whip up a quick bananna bread. It came out so moist and the pecans added a nice crunch.

What you’ll need:

* 1 white cake mix box (follow recipe on box to make a regular cake)

* 2-3 ripe banannas

* 1/2 cup of butter

* half a teaspoon of baking soda

*2 containers of store bough cream cheese frosting. You can make it yourself, but I find this way easier and I’m all about easy baking!

Steps:

  1. Preheat the oven to 350 degrees. Grease and flour your cake pans.
  2. Follow the instructions on the cake mix box. Using an electric mixer, mix in the baking soda and butter.
  3. Mash banannas
  4. Chop pecans
  5.  Stir in mashed bananas and chopped pecans
  6. Top with cream cheese frosting and chopped pecans.

This cake was a huge hit. It was so easy to take a simple boxed cake mix and turn it into another delicious banana recipe!

Enjoy!

image

image

image

Deep-Fried Oreo Recipe

Deep-Fried Oreo Recipe

Nothing like creating a fair food favourite right from the comfort of your own home!

image

Follow the easy steps below to make this creation yourself.

What you will need:

1 cup of pancake mix

2/3 cup of milk

1 egg 2 tsps of vegetable oil

1 box of Oreo cookies

Vegetable oil for frying

Confectioner’s sugar (optional)

Prep:

  • Freeze your Oreo cookies for 1 hour
  • Fill a durable pot with 2-3 inches of cooking oil (on medium heat or to about 375°F)
  • Wisk pancake mix until smooth
  • Dip one cookie at a time in the batter (important step so your cookies don’t get soggy sitting in the mix) coating it well
  • Carefully drop your coated cookies in the hot oil flip once until each side is golden brown (it doesn’t take long!)
  • Remove cookies from hot oil with tongs (be careful) and place on a paper towel
  • Arrange on a platter and dust with confectioner’s sugar
  • Best enjoyed warm and maybe with a side of vanilla ice cream!

Chocolate Cupcakes With Vanilla Candy Cane Icing

Chocolate Cupcakes With Vanilla Candy Cane Icing

I used a lot of crushed candy canes in my Christmas desserts this year and this one turned out wonderfully!

All you need is to bake your favourite type of chocolate cupcake. I used a store bought mix but feel free to make yours all homemade! I decided to go for chocolate cupcakes so that the white icing and red candy cane crunch would really pop out at you!

Once your cupcakes are fully cooled down (I usually wait about an hour or so) remove the cupcake liners.

Next cut each cupcake horizontally down the middle

Using a piping page and star-point icing decorating tip place circle around the inside of the bottom half of the cupcake. Try going around the edges so that you can see the extra coming out. This step also makes it easier for your crushed candy cane to stick.

Place the top half of your cupcake back on and top it all off with a icing star and sprinkle a little bit more of your crushed candy cane on top.

VOILA, it’s that simple and they end up looking like you spent a lot of time on them!

I arranged my cupcakes on a large round platter and also placed some mini candy canes for a final touch! IMG_1577

Candy Cane White Chocolate Mini Cheesecakes

Candy Cane White Chocolate Mini Cheesecakes

Nothing says the holidays like chocolate and candy canes!

Here’s exactly what you’ll need to make these tasty little treats!

Ingredients:

  • 18 vanilla wafer cookies (Round)
  • 2 (8oz) cream cheese, softened
  • 1 (8oz) neufchâtel cream cheese, softened
  • 3/4 C sugar
  • 3 eggs
  • 1 tsp vanilla
  • 1 1/4 C white chocolate chips, divided
  • 1 1/4 C crushed mini candy canes, divided
  • 18 foil muffin liners

Directions:

  1. Preheat oven to 350 degrees.
  2. Place foil liners in 2 muffin pans (cheesecake holds better in foil liners and are easier to remove)
  3. Place 1 vanilla wafer in the bottom of each cup.
  4. Beat cream cheese until smooth, add sugar, eggs, and vanilla; just until incorporated.
  5. Don’t over beat!!!
  6. Gently stir in 3/4 C chocolate chips and 3/4 candy cane pieces.
  7. Fill each cup 3/4 of the way full.
  8. Bake 20-25 minutes or until almost set.
  9. Remove from oven; let cool 5 minutes on rack and then remove from pan.
  10. Once cool cover and refrigerate for 3 hours.
  11. Before serving; place remaining chocolate chips in a microwave safe bowl, microwave for 15 seconds, stir, 15 more seconds, stir, repeat again if necessary until smooth.
  12. Place 1 tsp crushed candy cane in the center of each cheesecake, use a fork to drizzle white chocolate back and forth over the tops.
  13. Enjoy!
  14. * to crush candy canes, remove wrappers, place in a freezer bag, hit with the back of a metal spoon.
  15. Place on a serving platter and arrange any sort of decorative Christmas items you can find (candy canes look really nice too!)

image   image

I will use this recipe for many holidays to come! 🙂

“You’re A Mean One Mr.Grinch”- Fruit Kebabs

“You’re A Mean One Mr.Grinch”- Fruit Kebabs

These little fruits on a toothpick went instantly at my Christmas party! They are so simple to make but look awesome!

What you need:

-fresh strawberries

-bananas

-large seedless green grapes

-mini marshmallows

-toothpicks

imageimage

Its as easy as starting with the mini marshmallow on the top followed by the strawberry, banana and then the grape to finish it all off!!

A healthy holiday treat!